

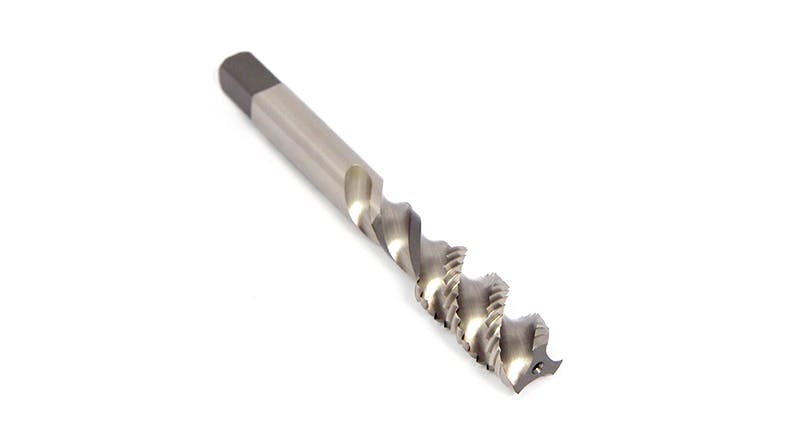
Tapping Away: Common Problems, Causes, and Corrections for Taps and Tap Sets
From breakage to loading, and galling to rough threads, we’ve got some answers that could save you some serious frustration and keep broken taps from breaking your bank.

Tapping is one of the machining types most prone to issues because it requires careful balance, planning, and research. Especially when you’re using a CNC machine, lack of sensory connection to the tapping operation can mean that you might miss issues until they’re too late to correct. Because tapping is also one of the last operations to be performed on a part, screwing it up can result in a whole lot of scrapped parts and wasted time. From breakage to loading, and galling to rough threads, we’ve got some answers that could save you some serious frustration and keep broken taps from breaking your bank.
First Issue: Tap Breakage
By far, the most obvious sign of an issue is tap breakage. If your tool is breaking, cracking, or chipping, you need to administer some TLC quickly. First, just double check that you’re using a machine with the correct power output, and tool. If your tool geometry is off, or the tap isn’t the correct hardness for the use case, you’re fighting a losing battle. Also, make sure the tap is sharp. If you’re working with a dull tap, you maybe have one or two sharpens before you should get yourself a replacement. Also, try not to let your tap get too dull before resharpening. Since dull tools can also cause work hardening (also a cause of breakage), you have extra incentive to stay on the up and up with your tool maintenance. Similarly, you can reduce issues by making sure you’ve got the right grind on your tap. A proper cutting angle and chamfer angle ensure good work.
Also often overlooked in tapping is the quality of the hole itself. If your drilled hole is too shallow or too small, you’re either going to ruin the tool or the workpiece with shoddy work. Keep in mind that drill size does not always equal hole size. Checking that the entire process is solid — not just the tool — is essential. If your drilled hole is too shallow for the tap you’re using, that’s going to cause issues as well. Either adjust your drilled hole or the length of your chamfer.
Similarly, if your drilled hole and your tap are misaligned — even by a frog hair — your tap is at risk of damage. Honestly, this is the number one reason for tap breakage. Misalignment by even a fraction will be magnified the further the process is pushed, and doubly cause screw-ups (see what I did there?) when your tap reverses from the hole. Misalignment-related breakage is also caused by using incorrect holding devices. Check that the holding device you are using is correct for alignment with the hole.
Lastly, you might not be applying the right kind of lubrication — and I don’t mean bribe money or bourbon (though we wouldn’t personally refuse either)*. If you’re experiencing breakage, chipping, or fracturing, you may need to reduce the friction on your tap by increasing the amount of lubrication during machining. You may need to switch the type of lubrication you’re using — a purpose-made tapping lubricant is your best bet. Better lubrication also improves chip removal. This is definitely one area where more is more.
*I’m joking. Or am I?
Second Issue: Tap Failure on Reversal
When your tap craps out during reversal, it might be because it’s cutting too tightly. Check that your cutting angle isn’t too small, and increase it if necessary. Galling is a possible player here as well. Basically, when your threads gall, the pressure, and friction between material and tap are high enough that some of the material is pulled along as the tap moves. That’s some pretty unfortunate physics. You can reduce pressure by decreasing the thread percentage you’re trying to cut at, and increasing your land(s) width. The face angle on the back of the land is often the main culprit in this case.
If your tap is stalling on reversal, the cause is likely chips jamming too tightly in the tap flutes. You should try to avoid this at all costs since it can quickly ruin your work or break your tap. If your chips aren’t forming and evacuating right, it might call for a different type of tap, with more generous chamfers or a cutting angle better suited to the material or project. As usual, also keep an eye on the lubrication type and amount you’re providing. Don’t skimp! Another possibility is that your flutes are ground incorrectly. If your flute geometry is wrong for the workpiece material, chip evacuation is going to be a whole mess.
Third Issue: Stripped or Chipped Tap Threads
If you’re having issues with stripped or chipped threads, it’s most likely that your tap and hole are not properly aligned. Even a slight misalignment can increase pressure and friction greatly. Check your tap holder and machine are right for the job, and possibly look into chamfering the hole before you try to use a tap on it. Also, make sure to check the tap alignment from several perspectives before you go ahead and start machining.
Stripping can also be caused by a dull or worn tap, which is also an issue that might “work harden” your workpiece. Sadly, trying to tap work-hardened material may also cause your tap to chip, which makes this issue a bit of a vicious circle. A poorly sharpened tap might produce similar results, so it’s sometimes better to replace a tool rather than risk ruining your work. Chipping is also a symptom of poor handling. Taps have to be much harder than the materials they are cutting, but this additional hardness also makes them brittle and prone to chipping. Handle with care! If you’re nice to your tools, they’ll be nice to you right back.
Your surface treatment can also make a whole world of difference when it comes to tap effectiveness and wear. Different coatings are optimal at different temperatures, and ideal for different workpiece types. Finding the correct combination of coating, tool geometry, and tapping speed is a tricky balance, but a worthwhile line to walk.
Fourth Issue: Torn Threads in Tapped Part
Torn threads are just about the biggest letdown after stripped threads. If your tap is tearing or pulling the metal as it turns, the issue is most likely that your speed is too low. You may also need to sharpen or replace your tap. Be sure that your tap doesn’t have broken threads itself, as that’s a problem for obvious reasons. The amount and kind of lubricant you’re using is also an important factor. Make sure you’re not being stingy, and are using an ideal lubricant for your use-type. Lastly, check that chips aren’t clogging up your flute and mucking up your machining.
Torn threads might also happen if your cutting face angle is too small. The cutting face angle is largely responsible for reducing impact load, as well as managing chip formation and evacuation. Slight differences in the cutting face geometry of your taps can take your part quality up several notches.
You also might need to check the size of the hole you’re drilling in comparison to the size of your tap. It could very well be the case that your tap drill is too small. This isn’t an uncommon problem, but it is an important one to get straight. The fight here is thread strength (i.e., enough material) vs. reasonable torque (i.e., bigger hole/tap ratio). If you’re getting pulled and torn threads, you probably need to reevaluate the relationship between your hole and tap, specifically to reduce torque. Depending on your needs, increase your tap drill size to create a larger hole, or possibly reduce your tap size.