Best Practices for a Perfect Bead Blast
A bead blast finish aims to leave a workpiece surface clean, smooth, and shiny. While this is the ideal result, a poor bead blast process can lead to the exact opposite. Follow the 5 key steps outlined in our guide to achieve a perfect bead blast, every time.

Bead blasting is the projection of a blasting media onto a surface using compressed air. The beads are commonly made from glass or plastic. Many factors affect the quality of a bead blast, and neglecting any number of them can result in a poor bead blast that can ruin a beautiful workpiece.
Bead blasting is performed for one or more of the following reasons:
- To prepare a surface for coating.
- To give a workpiece a specific surface finish.
- To harden a workpiece’s surface through shot-peening.
Follow the steps below to achieve a perfect bead blast.
1. Safety First
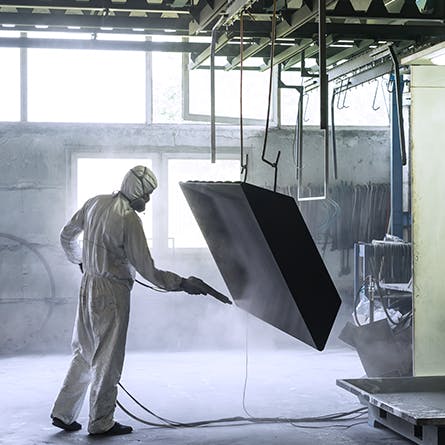
Your safety and the safety of coworkers should always be the top priority. Use a blasting cabinet whenever practically possible. If parts are blasted outside a blasting cabinet, anyone in the immediate vicinity should wear:
- Safety boots
- Eye protection
- Dust masks
- Overalls
- Earplugs
- Leather or rubber gloves
In addition, the blaster should also wear the following:
- Blast suit
- Air-fed blast helmet
- Operator’s breathing equipment
2. Preparation is Key
Thorough surface preparation is key to minimizing poor bead blasting. Removing surface contaminants like grease and oil can reduce blasting time by up to 50%. Stickers and other adhesive decals can take up to 10 times longer to remove than paint, and their adhesive backing can contaminate the blasting media.
Use a sharp scraping tool to check the toughness of the paint. If one light scrape removes the paint and exposes the bare substrate, it should blast off easily. If two or more hard scrapes are needed, allocate more time to the job or use a more aggressive blasting media.
Bead blasting will most likely ruin external threads. Protect them with tight-fitting plastic tubing, or wrap them with adhesive tape to cover the threads. Be careful to not blast away the tape as the adhesive backing may contaminate the blast media.
Blasting media will fill workpiece holes and cavities. Internal threads can be ruined if blasting them directly. Keep an assortment of plugs and bolts on hand that can be used to plug holes and threads. Use clay to protect odd-shaped cavities and sensitive surfaces. Take care to not blast away the clay as it may contaminate the blast media.
3. Select a Suitable Blast Media
The purpose of the blasting exercise and the type of substrate will determine the characteristics of the blasting media. The size, density, hardness, and shape of the beads should be considered.
Glass bead diameter can be classified as “fine” or “coarse”, or sized by “grit”. Common grits are 40–60, 60–100, 100–170, and 170–235. The bigger the grit (coarser) the more energy the beads have and the more likely they are to penetrate the substrate’s surface. Smaller-diameter beads are better suited to smaller features, and they carry less energy, removing less from the workpiece’s surface.
4. Air Pressure and Volume
Your compressor must be able to provide a sufficient volume of air to maintain the set air pressure. Air delivery should not exceed 80% of the compressor’s capability to ensure a sufficient volume of air is always available.
Glass beads are designed to polish or burnish a workpiece and so work best at lower pressures. Start with the compressor’s air pressure set at 3.5 bar (±50 PSI) and increase it until the desired effect is achieved. Turning the pressure up too high will break the beads on impact, creating excess dust, debris, and sharp particles. Small fragments of beads may be embedded in the workpiece’s surface, resulting in a poor bead blast by creating unwanted surface finishes and potentially affecting secondary coating processes.
5. Technique
Your work efficiency, comfort, and safety are impacted directly by the position of the blast hose relative to your body. When blasting large items with high pressure, hold the blast hose in front of your body or over your shoulder, and use your body weight to absorb the force of the air pressure. Have a coworker help you move and control the blast hose.
Blast the workpiece surface facing you. Once this surface is done, move the workpiece to expose another surface. Repeat this process until all surfaces are clean. Small parts can be mounted on a stand or held in locking pliers, giving greater freedom of movement.
A bead blast finish aims to leave a workpiece surface clean, smooth, and shiny. While this is the ideal result, a poor bead blast process can lead to the exact opposite. Following the above best practices will help machinists get the desired result. We have an experienced team that can help you select the best manufacturing techniques and technology to ensure your workpiece is manufactured most efficiently.
