The Xometry app works best with JavaScript enabled!
Our SolutionsIndustriesResourcesXometry EnterpriseHow Xometry WorksBecome a Supplier
Additive Manufacturing

3D Printing Service

Metal 3D Printing Service

Solutions For Every Industry
Resources3D Printing DesignHow To Create 3D-Printed Molds for Casting
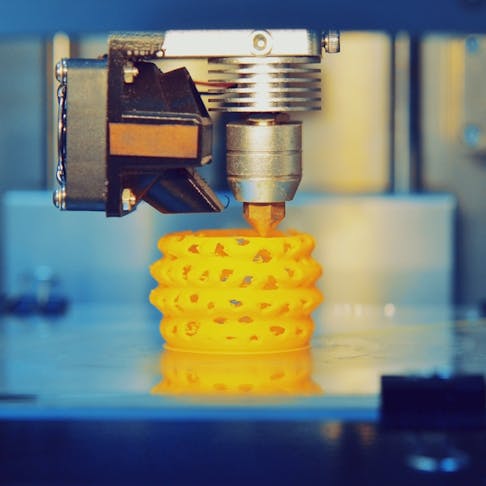
3D printer. Image Credit: Shutterstock.com/MarinaGrigorivna

How To Create 3D-Printed Molds for Casting

Xomety X
By Team Xometry
July 1, 2023
 17 min read
RECENT STORIES
CNC Router vs. CNC Mill — What's the Difference?
April 26, 2024
 15 min read

In modern manufacturing, the marriage of 3D printing and traditional casting techniques has opened up a world of possibilities. The ability to create custom molds with intricate designs and complex geometries through 3D printing has revolutionized the casting process. By harnessing the power of additive manufacturing, individuals and industries alike can now explore new avenues of creativity, efficiency, and cost-effectiveness in the production of high-quality cast objects.

This article serves as a comprehensive guide to the art of creating 3D-printed molds for casting. We will explore the step-by-step process of bringing your ideas to life and creating your casting mold through the use of additive manufacturing. 

1. Design a CAD Model

Begin by creating a 3D model of the mold using computer-aided design (CAD) software. Ensure that the model is designed with appropriate draft angles and parting lines to facilitate mold release and appropriate wall thickness for the casting material. Include mold features like sprues, runners, and vents to facilitate the casting process. Use CAD software to create the design such as: Autodesk Fusion®, SolidWorks®, Rhino3D®, AutoCAD®, and Tinkercad®, among others. 

When designing your model for 3D-printed molds, it's important to follow these guidelines, including: keep the design simple, avoid filled objects within hollow spaces, consider wall thickness, opt for symmetric designs, and design with final details in mind.

2. Determine if the Model Is Hollow or Solid

Depending on whether your model is hollow or solid, the casting process will differ. If your model is hollow on the inside, the casting process becomes more complex. Create a cast that supports the interior of the model and then remove the supporting structure from the final piece. Your final piece will have a hole somewhere, large enough to allow the removal of the supporting material when the cured resin is stretched.

However, if your model is solid, the casting process is simpler. Solid objects do not require any internal structures for support. In this case, you can skip ahead to step 4 of the casting process.

For more information, see our guide on Best 3D Printing Software.

3. Generate the Inside Structure for the Hollow Model

To generate the inside structure for a hollow model, there are several steps to follow. First, within the appropriate software, create a new solid block that is slightly smaller than the original hollow model. Then, position the original hollow model on top of the solid block and center it. Modify the properties of the original model to make it a "Hole" shape. This will ensure that the interior of the model will be filled in the next step. Merge the solid block and the modified original model. This will create an exact copy of the inside structure of the hollow model. To hold the inside structure in place within the final mold, add support pieces that will connect the inside structure to the external mold. These support pieces will be removed later on. Figure 1 illustrates the step-by-step guide to creating the inside structure for the hollow model:

Slide 1 of 1
creating inside structure of hollow mold

Process of creating the inside structure for the hollow model.

Image Credit: https://www.instructables.com/

By generating the inside structure in this manner, you create a replica of the hollow model's interior, which will be supported during the casting process. This structure allows for the proper formation of the mold while ensuring that the final piece can be removed without damaging its shape.

4. Generate a Solid Block Around the Model

Determine if your original model is already a solid piece or if it needs to be converted into one. If your model is already solid, you can proceed to the next step. Otherwise, you will need to modify it to ensure it is a closed, watertight volume. Design a block or box-shaped structure that is significantly larger than your model. This block will serve as the outer boundary of the mold and will form the walls that enclose the model. Place your model inside the block, ensuring that it is centered and aligned properly. The model should be surrounded by the block, with space between the model and the inner walls of the block. Merge or combine the block and the model to create a single, unified object. This results in a new 3D model in which the block forms the outer walls of the mold, and the model is enclosed within it. With the solid block encompassing your model, you have created the necessary structure for the mold. The block will define the shape and size of the final cast while providing support and containment during the casting process.

5. Split the Block in Two or More Pieces Depending on the Design

You may need to split the block into multiple pieces to ensure easy disassembly and extraction of the cast from the mold. This depends on the complexity of your model. Some considerations for splitting the block include: simplifying disassembly, assessing the model’s shape, and considering accessibility. In simplifying disassembly, the primary objective is to make the mold easily separable once the cast is cured. This allows for the extraction of the final part without damaging it. Avoid creating wedges or shapes that would hinder the disassembly process. When assessing the model’s shape, examine the shape of your model to determine the optimal locations for the splits. For instance, if your model resembles a sphere, you will need at least one split along the middle to facilitate pulling the parts apart. Ensure that the chosen splits provide sufficient access to the interior of the model. This will allow you to remove the cast without resorting to squishing or deforming the model, as the block surrounding the model is solid.  

6. Embed the Model Into Solid Blocks

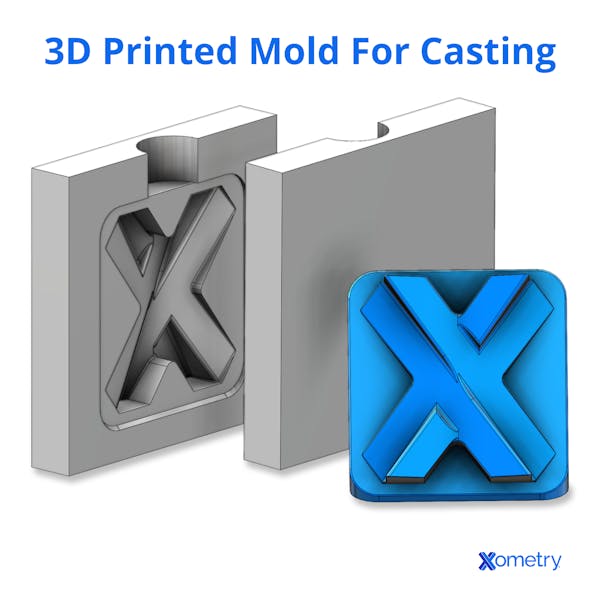
Place your symmetrical model sideways within the split blocks so that it is centered. This positioning allows for equal coverage on both sides of the model when the blocks are combined. Carefully bring the blocks together, ensuring they fit snugly around the model. Align the blocks properly, taking note of any guiding features or registration marks that ensure proper alignment. Incorporate alignment pins to ensure the mold halves meet accurately and maintain alignment. These pins will serve as guides, ensuring the mold halves fit together precisely when closed. Incorporate a central channel to facilitate the flow of the casting material. This channel should be wide enough to accommodate the resin, especially if it has a higher viscosity. The wider channel allows for smoother flow and helps prevent blockages or air bubbles during the pouring process. Design a chamber that sits on top of the mold and contains additional resin. This chamber takes advantage of gravity, as the liquid resin will naturally flow down into the mold. The size of the chamber determines the amount of resin available to push down into the central channel and ensures sufficient material fills the mold.

7. Start the 3D Printing

Now it’s time to start printing the mold. To begin the 3D printing process for your mold, ensure that your 3D printer is in good working condition and properly calibrated. Check that the printer bed is clean and level and that the printhead or extruder is clear of any obstructions. Select a suitable printing material for your mold. Consider factors such as the casting material, desired mold properties (such as flexibility or heat resistance), and compatibility with your 3D printer. Common materials for mold printing include various types of resins and thermoplastics. 

Use slicing software to prepare the digital model for 3D printing. This software takes the 3D model file and generates a series of instructions for the printer to follow, specifying layer height, infill density, print speed, and other settings. Adjust these parameters according to your specific requirements. Load the chosen printing material into the 3D printer. This may involve loading a spool of filament or pouring resin into the appropriate reservoir, depending on the type of printer you are using. Start the 3D printing process by sending the sliced file to the printer. The printer will begin creating the mold layer by layer, following the instructions provided by the slicing software. Monitor the progress initially to ensure proper adhesion and quality, and address any issues that may arise.

8. Use the Printed Mold and Pour the Silicone to Start the Casting Process

To start the casting process, mix the silicone according to the manufacturer's instructions, ensuring the proper ratios of base and catalyst components. Once the silicone mixture is ready, slowly and evenly pour it into the mold. Begin pouring from one end, allowing the silicone to fill the mold cavities. Take care to avoid introducing air bubbles during the pouring process, as they can negatively impact the final cast.

Gently tap or vibrate the mold to eliminate any trapped air bubbles. This helps the bubbles rise to the surface, ensuring a smooth and bubble-free cast. Alternatively, you can use specialized equipment like a vacuum chamber or pressure pot designed for silicone casting to remove air bubbles more effectively.

Allow the silicone to cure based on the recommended time provided by the manufacturer. Curing times can vary depending on the type of silicone used, so be sure to follow the instructions closely. It is essential to give the silicone sufficient time to fully harden and cure before proceeding.

Once the silicone has completely cured, carefully demold the cast. Depending on the design of your mold, you may need to separate the mold halves or flex the mold to release the cast. 

9. Trim the Excess Parts

After successfully demolding the cast from the silicone mold, the next step is to trim away the excess parts. These excess parts refer to any additional silicone material that may have flowed outside the desired shape or formed along the edges of the cast.

Carefully examine the cast and identify the areas that need trimming. Using a sharp hobby knife or scissors, start trimming away the excess silicone, following the outline of the intended shape. Take your time and work slowly to ensure precision and avoid accidentally cutting into the actual cast. Depending on the complexity of the cast, you may need to use different tools or techniques to achieve the desired result. Trimming the excess parts is an important step in the casting process as it helps to enhance the final appearance and quality of the cast. By carefully removing the excess silicone material, you can refine the details and achieve a clean and polished result that closely resembles the original model.

What Are the Advantages of 3D-Printed Molds for Casting?

The use of 3D printing for casting molds has a wide range of advantages, including:

  1. 3D printing offers unparalleled design freedom, allowing the creation of intricate, thin-walled geometries in a single step without the need for additional tools. 
  2. 3D printing offers significant cost advantages. The requirements are minimal: a digital file, printing material, and a 3D printer. 3D printing eliminates the need for additional equipment and labor. 
  3. 3D printing patterns follow an automated process, enabling rapid production. Patterns can be printed in a matter of hours or days. Moreover, if a pattern does not meet requirements or needs modifications, digital designs can be easily adjusted and reprinted, reducing turnaround time.
  4. 3D printing minimizes raw material consumption and reduces waste generation. It only uses the necessary material to create the final printed pattern.
  5. By utilizing digital files and 3D printing, the need for physical model inventory is eliminated. Instead of storing and managing physical molds, new patterns can be quickly and cost-effectively 3D-printed on demand.

What Are the Disadvantages of 3D-Printed Molds for Casting?

While there are many benefits that 3D printers can bring to the mold-making industry, there are also some disadvantages to consider:

  1. Investing in a 3D printer, especially larger-scale models, can require a significant upfront investment. 
  2. 3D-printed molds often require additional post-processing and finishing steps to achieve the desired mold quality. This may involve sanding, sealing, or applying surface treatments.
  3. The durability and lifespan of 3D-printed molds may be inferior to those produced using traditional methods. Depending on the materials and printing techniques employed, 3D-printed molds can be more susceptible to wear, deformation, or degradation when exposed to the stresses and temperatures associated with casting processes.
  4. The size of 3D-printed molds can be limited by the build volume of the 3D printer. If a larger mold is required for casting large parts, it may need to be printed in multiple sections and assembled.
  5. 3D-printed molds may not always achieve the same level of surface finish and texture as molds produced through traditional methods like machining or mold making. Depending on the 3D printing technology used and the resolution of the printer, the resulting mold surface may exhibit visible layer lines or roughness.

What Is a Mold for Casting?

A mold for casting refers to a specially designed structure or container used to shape and solidify liquid or molten materials into a desired form. Casting molds are commonly used in various manufacturing processes to produce objects or parts with specific shapes, dimensions, and details. Molds for casting can be made from a variety of materials, depending on the casting process and the material being cast. Some common mold materials include: sand, metal, silicone, rubber, plastic, and ceramic.

The design and construction of casting molds are critical to achieving accurate and high-quality castings. Mold makers consider factors such as material shrinkage, draft angles for easy mold removal, gating and venting systems for proper filling and air escape, and other considerations specific to the casting material and process.

Why Are 3D Printed Molds Cheaper?

A 3D-printed mold is often considered cheaper compared to traditional mold-making methods for several reasons. Traditional mold-making processes typically require the production of complex and expensive tooling, such as CNC-machined molds. These tools can be costly to design, manufacture, and maintain. In contrast, 3D printing eliminates the need for tooling. The mold can be directly printed from a digital file, significantly reducing tooling costs. Design iterations with 3D printing are much simpler and more cost-effective. Changes can be made directly in the digital file, and the updated mold can be quickly printed without the need for new tools or extensive manual labor. Additionally, 3D printing allows for on-demand production for which molds can be printed as needed.

What Are Other Types of Casting?

Metal casting processes utilize various types of molds made from different materials to meet the specific requirements of the metal being cast. The name of the casting process often corresponds to the type of mold used. Some other common metal casting methods include:

  1. Sand Casting: This involves creating molds using a combination of sand with a bonding agent, typically clay. The mold is created by compacting the sand around a pattern and creating a channel or gate for pouring the molten metal. After the mold solidifies, the pattern is removed, and the metal is poured into the cavity. Once cooled, the sand mold is broken away, revealing the final part. Sand can often be recycled for additional molds, making sand casting a cost-effective method. It is widely used, accounting for approximately 60% of all metal castings, and is suitable for a range of applications, including heavy steel foundry applications.
  2. Investment Casting: The term "investment" refers to the process of encasing or surrounding the pattern with a material, usually wax or refractory material. The wax pattern is coated with a ceramic slurry, forming a mold. The wax is then melted and burned away, leaving behind a cavity that is subsequently filled with molten metal. Investment casting is commonly known as "lost-wax casting" and is widely used in the jewelry industry due to its ability to create intricate and detailed parts.
  3. Plaster Casting: Plaster casting is similar to sand casting, but instead of sand, the mold is made of plaster. This method is often used for producing small parts such as valves, gears, and fittings. However, plaster casting cannot be utilized for ferrous materials such as steel. Plaster molds are more unstable than sand molds, and the longer cooling time limits production volumes.
  4. Die Casting: In die casting, molten metal is injected into a mold under high pressure. This process is commonly used for producing engine blocks and ship propellers. Die casting is predominantly used with non-ferrous materials like aluminum, pewter, tin, or copper. Die-cast molds are durable and resilient, making them ideal for industries requiring high-volume production of small to medium-sized castings.

Can You Use PLA for Casting?

No, PLA (polylactic acid) is generally not suitable for direct casting processes that involve high temperatures or require the material to withstand heat and other casting-related conditions. PLA has a relatively low melting point compared to other materials commonly used in casting, such as metals or resins. When exposed to the high temperatures required for metal casting, PLA would melt or deform rather than maintain its shape as a mold. Additionally, PLA may not have the necessary strength, durability, or resistance to chemicals and abrasion required for casting processes.

However, it's worth mentioning that PLA can be used to create patterns or prototypes for investment casting or sand casting indirectly. This method is known as lost-PLA casting. Lost-PLA casting, also known as investment casting with a PLA pattern, is a casting process that utilizes a 3D-printed PLA pattern as a sacrificial component in creating a mold for metal casting. For more information, see our guide on All About PLA 3D Printing Filament.

Can You 3D Print Molds for Metal Casting?

Yes, it is possible to 3D print molds for metal casting. When selecting a printer for 3D printing molds, various 3D printing technologies can be employed, provided that the material used is appropriate. However, only a few companies currently specialize in sand 3D printers utilizing binder jetting technology. This technique involves selectively depositing a binder agent to bind the sand particles together.

When it comes to 3D printing models for die casting, sand, or plaster, it is crucial to select a material that can endure abrasion, high temperatures, and the chemicals involved in the casting process, such as mold releasers and binders. The chosen material should resist warping or damage. Fortunately, there is a diverse selection of plastics, ceramics, metals, and composite materials available that possess the desired characteristics, making them suitable options for creating patterns.

Summary

This article presented creating 3D printed molds for casting, explained the process, and discussed the advantages and disadvantages. To learn more about 3D printed molds, contact a Xometry representative.

Xometry provides a wide range of manufacturing capabilities, including 3D printing and other value-added services for all of your prototyping and production needs. Visit our website to learn more or to request a free, no-obligation quote.

  1. Fusion®, Tinkercad®, and AutoCAD® are trademarks of Autodesk, Inc., and/or its subsidiaries and/or affiliates, in the United States
  2. SolidWorks® is a registered trademark of Dassault Systèmes SolidWorks Corp
  3. Rhino3D® is a registered trademark of Robert McNeel & Associates

Disclaimer

The content appearing on this webpage is for informational purposes only. Xometry makes no representation or warranty of any kind, be it expressed or implied, as to the accuracy, completeness, or validity of the information. Any performance parameters, geometric tolerances, specific design features, quality and types of materials, or processes should not be inferred to represent what will be delivered by third-party suppliers or manufacturers through Xometry’s network. Buyers seeking quotes for parts are responsible for defining the specific requirements for those parts. Please refer to our terms and conditions for more information.

Xomety X
Team Xometry
This article was written by various Xometry contributors. Xometry is a leading resource on manufacturing with CNC machining, sheet metal fabrication, 3D printing, injection molding, urethane casting, and more.