Full Color 3D Printing Best Practices


Learn the best practices and methods for full color 3D printing and how to order a full color print using Xometry's PolyJet services.

What is Full Color 3D Printing?
Most 3D printing requires a single color filament or secondary processing like dyeing or painting to achieve color. Most 3D prints are limited to a single solid color. With technologies like PolyJet, full-color 3D printing technology is available. PolyJet enables thousands of colors to be reproduced simultaneously in a single build. Xometry’s full-color 3D printing capabilities allow us to produce over 600,000 unique colors. PolyJet allows exact or approximate color matching to Pantone, RAL, HEX, CMYK, transparency, and other color inputs.
Xometry utilizes Stratasys’s latest PolyJet printing technology and can print parts with patterns, textures, and transparency. We can even simulate different material properties, such as a mix of rigid and rubber-like materials in the same print. PolyJet 3D printing makes realistic concept models with incredible detail that can simulate a product's performance and looks.
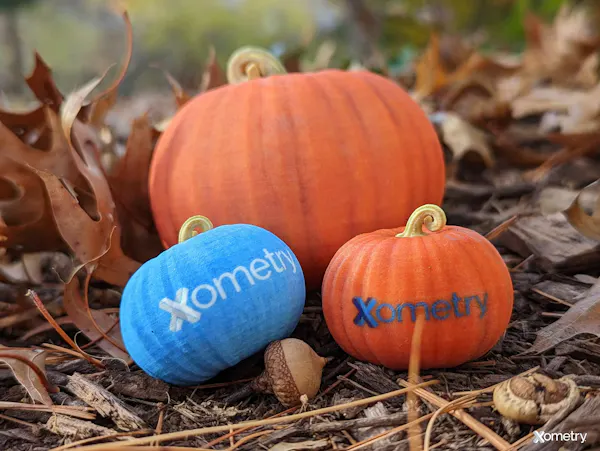
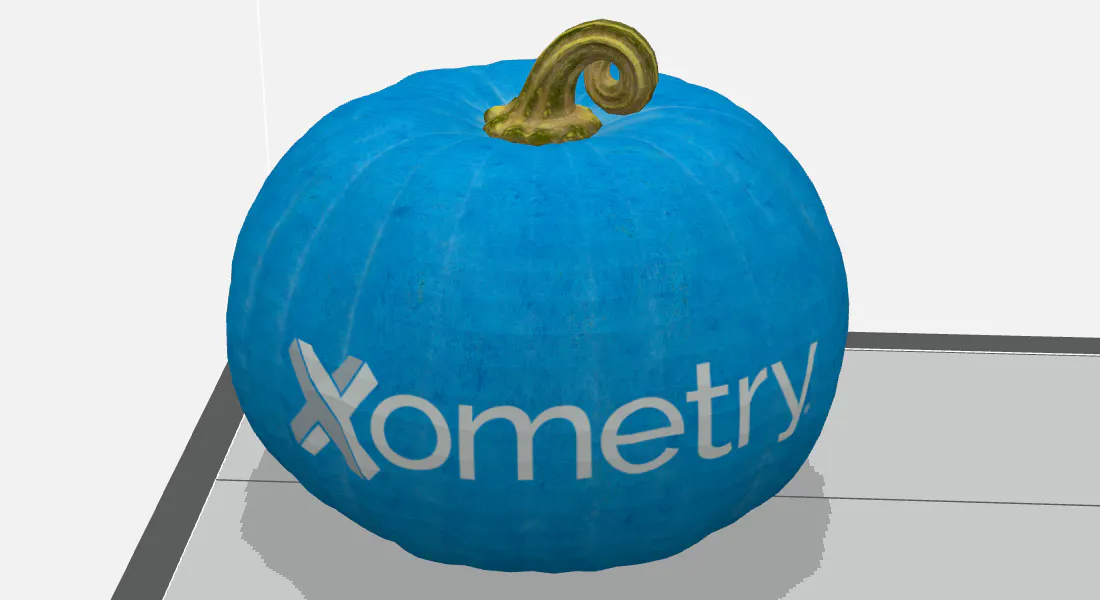
Full color prints printed by Xometry.
Best File Formats for Full Color 3D Printing
When it comes to full-color 3D printing, it is crucial to use an appropriate file format. Traditional formats used for 3D printing, such as STL, cannot retain texture, scale, or color data. STL files imported into printing software come through as plain, colorless files. Thankfully, a few formats store the required information, which we have outlined below.
3D Manufacturing Format (.3MF)
The 3MF file format is relatively new compared to other 3D file formats, but it is quickly becoming one of the go-to options for 3D printing. There is a good reason for its growing popularity--3MF encompasses information about materials, colors, textures, support structures, dimensions, and more, all within a single file. 3MF files typically are smaller file sizes than STL without compromising resolution. We recommend using 3MF as it is natively supported in the Xometry Instant Quoting Engine® and due to its “drag and drop” simplicity.
Pro Tip: If your software doesn’t support 3MF and you need to use another format, such as one of the others listed below, you can still email your files to support@xometry.com for a manual review and quote.
Wavefront OBJ (.OBJ)
OBJ is well-adopted and widely supported among CAD and 3D design software. These files define objects by their vertex positions and UV texture coordinates. Unlike 3MF, Wavefront OBJ files do not store the actual material and texture information inside a single file; instead, they rely on material libraries and companion files to get the job done. They cannot also store unit information that defines exact dimensions. For full-color 3D printing, this can lead to issues such as colors and textures not coming through properly or parts coming in at incorrect sizes. When using OBJ, the associated companion files (e.g., material files, images for textures, etc.) must be in the same directory or folder as the OBJ itself.
Pro Tip: The best way to provide an OBJ to a manufacturer for full-color printing is to put all the necessary files in a folder, then compress the folder into an archive (e.g., a .zip file), which can be uploaded or emailed.
Virtual Reality Modeling Language (.wrl)
Also known as VRML files, this graphical/virtual modeling format is primarily used to visualize 3D objects, figures, and environments. VRML can represent polygonal meshes, surface colors, texture information, and transparency, making it useful for color 3D printing. When using image textures for color assignment, VRML files reference a separate texture file in the same directory, similar to OBJ files. Like OBJ, any WRL package should be zipped and shared with support@xometry.com for a manual review. If possible, convert or save the project as 3MF for instant quoting through Xometry.
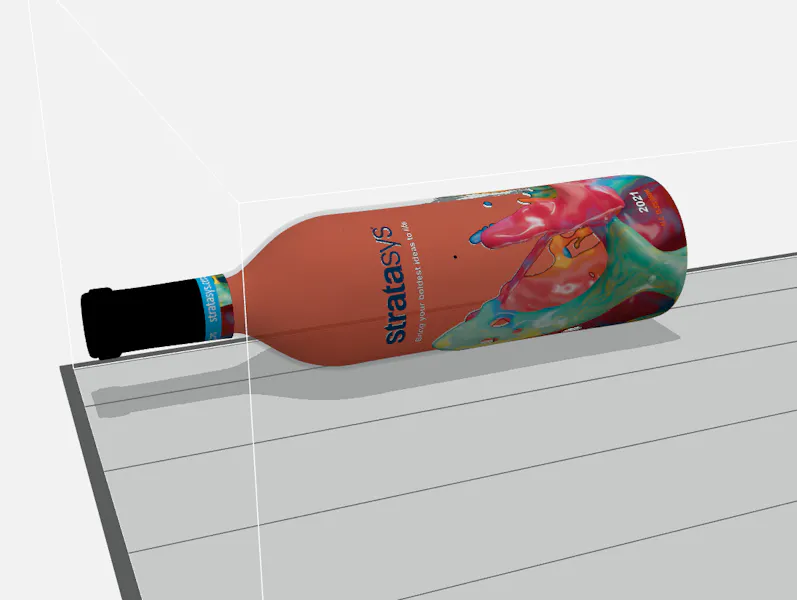
A textured 3MF file loaded into build preparation software.
Adding Color to a Model for 3D Printing
Designers can use several methods to directly assign colors in a 3D model for full-color 3D printing. Your specific use case will determine what the best and most efficient technique to choose from is. In most cases, coloration can be done directly in the software you used to create your model.
Color by object, shell, or mesh:
This method is best for making your entire object one solid color—making parts specific colors can help differentiate part configurations, aid in assemblies, or for aesthetical purposes. A solid-colored object can directly print in various technologies, such as FDM 3D printing, by selecting colored material when ordering. However, if you are looking for a custom color, our full-color PolyJet capabilities are still the way to go. In your design software’s material or appearance menus, apply the desired color to your entire object.
Pro Tip: With PolyJet, we can manually assign colors to entire objects with our build software. You can upload any accepted 3D file, select the “Other” color option during quoting for PolyJet, and tell us what color you’d like us to print it in via the notes section or an attached drawing.
Color by face:
Assigning color by face means selecting a particular triangle, face, group of polygons, or feature in your design software and assigning it a specific color. Coloring by face is an excellent technique for giving embossed or engraved text contrast and giving features unique colors on the same object. The selection method may vary depending on your design software. Still, the core idea is to select specific areas instead of the entire object and assign a color or material to each.
Color by texturing / UV mapping:
Applying a texture map to an object is the best way to create highly detailed and realistic colored prints. However, it can also be one of the most challenging techniques and could require learning additional skills to utilize it to its highest potential. Texture mapping requires a 2D image or graphic applied or overlayed on top of the 3D model to alter its appearance. Textures can allow you to overlay logos and text on your parts or even mimic the look of other materials, such as wood grains, textiles, and more. The level of detail makes texturing excellent for producing miniatures, art replicas, and product prototypes that look real.
An object’s UV coordinates relate the information in the texture map to corresponding mesh coordinates, dictating how a texture is applied. Taking your object’s 3D mesh and flattening it into a 2D map is called “UV Mapping” or “Unwrapping” a model. Some design software has UV mapping capabilities built-in; otherwise, you may need to use separate software dedicated to texturing to UV unwrap and wrap a model properly. If you are new to texture mapping, we recommend searching for online resources, such as UV mapping tutorials specific to the design software you use.
Pro Tip: A good way to ensure your textures are correctly applied and will come through is to open your printing file (e.g., 3MF) in Microsoft’s 3D Viewer, a program that comes pre-installed with Windows 10 and later.
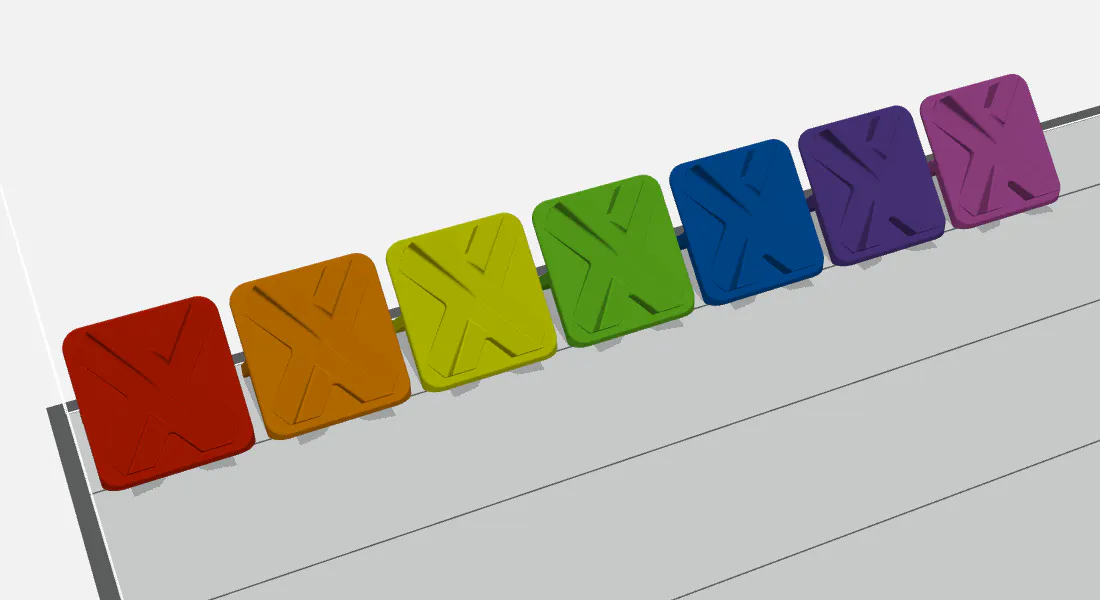
An array of parts colored on a per object level.
How To Order a Full Color Print
As mentioned previously in this article, we highly recommend using the 3MF file format for your colored or textured prints. You can follow the steps below to quote and order a full-color print using the Xometry Instant Quoting Engine®.
- Go to https://www.xometry.com/quoting/home/ and upload your .3MF files.
- Once your parts are analyzed, click on the “Configure Part” button below the file name.
- Select “Plastic 3D Printing“ and “PolyJet“on the configuration page under the process and technology drop-down options. You can also update the part quantity.
- Select “Multi-Color, CAD-Defined“ from the material drop-down options.
- Attach any associated drawings in the “Drawings and Files“ section on the left. You can also write notes for the production team at the bottom of the page.
- Once finished, click on the “Save Properties“ button in the top right of the page to return to the quote summary page. Once all parts are configured, you can checkout with the “Continue to Shipping“ button on the right.
