Product Development Guide: Rapid Prototyping
Prototyping is a critical process on the road to production. Performing fit checks and tests, making revisions, and using a physical model to sell the concept are all important stages on this path.

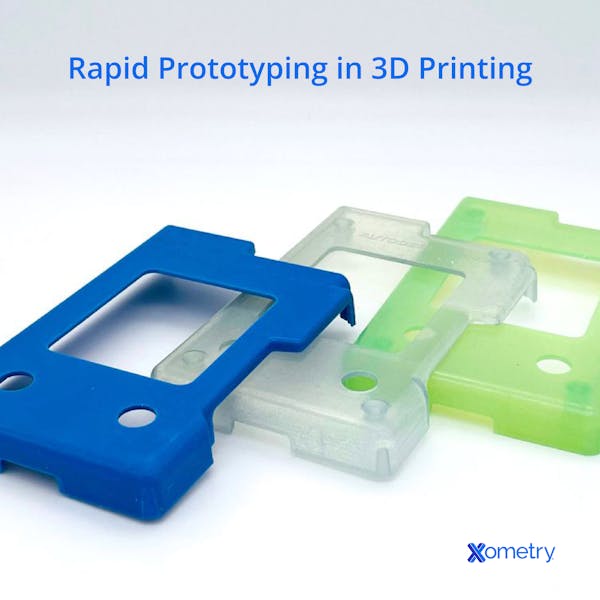
One rapid prototype definition involves manufacturing a single or small amount of parts from a CAD file using various processes. To rapidly prototype a part, you'll need to create a design, then a physical mockup. From there define your crucial dimensions and build a CAD model, then you're ready to 3D print or otherwise manufacture your prototype. Once the prototype is created, it's important to test and refine the design before creating an updated version to be released.
Even for experienced engineers, the prototyping process can be daunting. There are always questions about how little or how much to prototype before moving to future product development stages. Often, there is pressure to get to market. This should be balanced with designing a purposeful, functional product and ensuring that there is a real market to serve. The tips below outline some best practices for launching into rapid prototyping, starting with low-fidelity concept models to near-production prototypes.
What is Rapid Prototyping?
Rapid prototyping is a method of prototype product development using a 3D CAD model and various manufacturing processes to create either one or a small number of a finished product. While most rapid prototyping is associated with 3D printing, CNC rapid prototyping can also be done, as well as laser cutting and sheet fabrication.
Rapid prototype development enables companies to save time and money through the avoidance of costly mistakes in design or part failures. For companies where part performance is paramount, or expensive certifications are needed for the part, prototyping is absolutely crucial. However, it can also help in manufacturing less crucial parts and products by allowing the company to find less expensive or better ways of designing them.
Check out our webinar on Serial Production and Program Management to see how our capabilities can help you during the prototype production process.
1. Sketch Out the Prototype Design
Sketching out the design helps solidify what your rapid prototyping model needs. One of the most common mistakes when prototyping is jumping right into 3D CAD modeling without sketching. A few pieces of paper can significantly speed up the 3D design process with low investment and quick iterations. Getting an idea down on paper helps crystallize your thinking and often highlights some of the biggest challenges.
2. Create a Physical Mockup of your Prototype
Creating a physical mockup enables you and others to check for design flaws before going to the expense of product prototyping. Make one. It doesn’t have to function, so don’t dwell on it. Cardboard, foam stock, and sticky tape are acceptable materials. The goal here is to have something you can hold and view from different angles. This is often called a benchtop model.
If you’re working with a team, this step helps ensure you’re on the same page with the design. A down-and-dirty mockup will also highlight any glaring errors, like trying to have two components simultaneously occupy the same space. Make sure stakeholders like sales and marketing also see the mockup to provide feedback.
3. Measure the Part
Measure your part's dimensions and where it will interact with other parts. Look at mating components as well as your benchtop model and mockups. Define any critical dimensions early since they will be defining the CAD packaging requirements.
The finished version will be the basis of your 3D CAD model.
4. Build a 3D CAD Model for Product Prototyping
Build a 3D CAD model to manufacture the part from. You can take the dimensions you measured on the rough prototype for this. If you’re not proficient in 3D CAD software, there are other options available to connect with designers.
Online providers can design, fix, or reverse engineer your CAD file for a small fee. You can also connect with freelance CAD designers, who typically charge $20-50+ per hour, depending on the requirements. The more engineering and discovery your part requires, the more expensive the design will be to make. Give your CAD designer the sketch with dimensions, along with any notes on materials. Mention that you plan on getting parts 3D printed, but make sure they know what manufacturing process the parts will ultimately be in because each process has its own design rules. By designing with the end manufacturing process in mind, you should be able to move from prototype to production quicker by mitigating serious redesign efforts.
Make sure files are saved in the appropriate formats. A few of the most common file types include .step, .ipt, .stl, and .sldprt. Note that solid models, such as STEP files, can be interpreted by all manufacturing processes whereas mesh files like STL models can only be used for 3D printing.
Need help with designing for manufacturing (DFM)? Check out Xometry’s free design guides.
5. 3D Print Your Prototype
3D print your design to create a testable model. 3D printers produce parts by fusing materials, often layer-by-layer, to form a shape based on 3D CAD models. Not only can 3D printers build product prototypes suitable for testing, but also these parts can often be manufactured quickly.
Most 3D printing technologies can produce the shape of your design, but choosing the right process for your short-term goals can help reduce the amount of prototyping needed.
Below are some leading industrial 3D printing processes for creating prototypes:
- Selective Laser Sintering (SLS) - Creates complex parts at a low cost in fused nylon. Parts are robust for end-use durability.
- HP Multi Jet Fusion (MJF) - Creates complex parts using firmer or more flexible materials. The surface is similar to SLS and tends to be most economical on small parts.
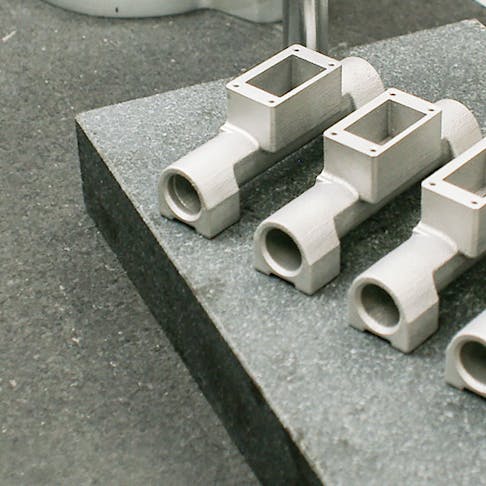
- Metal 3D Printing - Often called DMLS, DMLM, or SLM, this process makes matte metal parts that resemble cast components with high performance and strength. They can be machined or sand-blasted to create a smoother finish.
- Stereolithography (SLA) - Uses engineered resins that cure to mimic common thermoplastics like ABS or polycarbonate. High material varieties and smooth surface finishes allow for better fit-check and cosmetic models.
- Fused Deposition Modeling (FDM) - Builds parts in thermoplastics like ASA, ABS, PC, and Ultem by fusing an extruded filament to form the shape of the part. FDM can print very large parts and has specialty materials like static dissipative ABS-ESD7.
If the prototype absolutely needs critical tolerances and finishes, there are also economical options for CNC machining prototypes. Xometry’s team has provided some ways to save money on CNC prototypes.

6. Test and Refine the Prototype Design
Test and refine your design to find design flaws to be fixed. This is a key step to rapid prototype development. Test the model and note what aspects work and what needs changing. Note that it’s important not to rush, because you don’t want to keep going around the print-test-modify loop.
The degree to which you can test depends on how functional you need the prototype. At the very least, typically, it’s possible to verify how components look and feel, as well as how they’ll work together. Mark up the drawings and either make the 3D CAD updates yourself or have your designer help update the model for you.
The ability to rapid prototype is critical throughout product development. This allows verification of a feature or function, or identification of an issue, before heavy investments are made in a design direction. Rapid prototyping is a decision tool that is useful internally as well as externally to start validating a market fit. Rapid prototyping is more accessible than ever, with access to tools like 3D printing, on demand electronics manufacturing, and digital tools to simulate outcomes so there isn't much excuse to not use prototyping when developing or updating a product.Greg PaulsenDirector, Applications Engineering
7. 3D Print the Updated Version of your Prototype
3D print the updated version as needed to continue testing and refining your design. As a part of testing and refining, you’ll likely need to re-print your model (potentially multiple iterations) using low-cost 3D printing and even modifying prototypes with hand tools. With each new print, adjust the CAD model as needed based on observations.
In larger components, it can be more economical to test standalone features for functionality, or do a “shotgun” approach where you print multiple variations of a design at once for review and comparison. It is significantly less expensive to find and correct errors in this stage than down the line in production.
8. Release the Design
Congratulations! You have compressed your prototype development timeline with the latest 3D printing and 3D CAD technologies.
Once the rapid prototyping phase is over, you can continue to use Xometry’s 3D printing services for production parts or move to other production processes like CNC machining, sheet metal fabrication, or injection molding.

