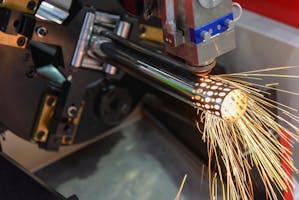
Xometry instantly quotes laser tube cutting and tube bending projects. Projects quoted through the Xometry Instant Quoting Engine will always assume normal to surface cuts to reduce lead time and cost. Not sure what a normal to surface cut is? Click here to learn more.
Normalizing tube cuts in your model may seem daunting, but it only takes a few tools! This article will guide you through two methods for normalizing mitered tube cuts in SolidWorks.
Not all tube cuts are normalized the same way. Be sure to read our other design guides to learn methods for normalizing different cuts.
1. Make a Ruled Surface

Start by clicking the Ruled Surface tool from the Surfaces tab. Before making selections, set “Normal to Surface” as the “Type”. This will make the ruled surface extrude normal to the surface of the selected edge.
Next, select the inside edge of your mitered cut. This selection will be recorded as your “Edge Selection” and a yellow preview of your ruled surface should appear.
Then, input any distance greater than the thickness of your tube so that the ruled surface extrudes past the outside surface of the tube. If your ruled surface is extruding inwards, click the “Reverse Direction” icon to change the direction.
Finally, click OK.
Pro Tip: If the ruled surface is not extruding outward, select the edge from the “Edge Selection” and click “Alternate Face”. This will change the face the tool is referencing.
2. Delete Faces

Now that we have our ruled surface, click the Delete Face tool in the Surfaces tab. Before making selections, make sure “Options” is set to “Delete”.
Next, select all faces of your tube EXCEPT for the outside face. You can do this by selecting each face individually, or by selecting the inside face and clicking “All Outer and Inner Loops” from the selection toolbar.
Click OK. You should be left with the outside surface of the tube and your ruled surface.
3. Trim Surfaces
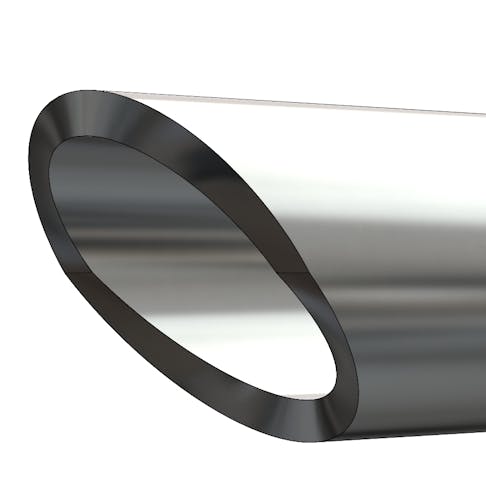
Unlike other normalized cuts, correctly normalized miter cuts have an inflection point. To create this inflection point we will trim away excess surface with our ruled surface.

Click the Trim Surface tool in the Surfaces tab. Make sure the “Trim Type” is “Standard” and the “Selections” are set to “Keep Selections”.

Select the ruled surface as the “Trim Tool” and the tube surface as the “Pieces to Keep”.
Click OK.
5. Thicken Surface

With the excess surfaces removed, click the Thicken tool in the Surfaces tab. Select the outside tube surface as the “Surface to Thicken”. Change the thickness direction until the feature is thickening inward. The yellow preview should be inside of your tube.
Enter the wall thickness of your tube and click OK.

Congratulations! You have normalized your miter cut using the Trim Surface Method.
3. Replace Faces

Now that the miter cut face has been split into two faces, it’s time to replace them with the faces of our ruled surfaces.
Click the replace face tool from the Surfaces tab. Select the upper face of the miter cut followed by the lower face as the “Target Faces for Replacement”.
Next, select the ruled surface from the inside edge followed by the ruled surface from the outside edge as the Replacement Surfaces.
It is important to make the selections in the order listed here. Otherwise you could receive an error for self-intersecting geometry.
Click OK.

Congratulations! You have normalized your miter cut using the Replace Face Method.
FAQ
What is a normal to surface cut?
A normal to surface cut is a cut that is perpendicular to the surface of the tube. These cuts are industry standard and can reduce lead time and price of laser tube cutting projects. To learn more about normal to surface cuts, click here.
Do I need to model my cuts normal to surface?
No. But modeling can help you understand how your design will look after fabrication.
Why is my Ruled Surface not normal to surface?
Make sure the “Type” is set to “Normal to Surface”. If the “Type” is correct, select the problematic edge and click “Alternate Face” until the ruled surface is extruding in the correct direction.
Why is Replace Face producing an error?
Make sure the replacement surfaces are selected in the same order as the target faces. Every target face should have a corresponding replacement face that is located such that the replacement does not create self-intersecting geometry.
Can I normalize coped cuts with these methods?
Technically yes, but there are some better ways. Coped cuts and other types of tube cuts don’t require an inflection point. This allows for the use of more efficient methods. To learn these methods, click here.
Does this method work for normalizing mitered cuts on rectangle tubes?
Methods to normalize cuts on rectangle and square tubes are similar to round tubes, but have some key differences. Review Designing Normalized Mitered Cuts on Rectangle Tube to learn our favorite method.
How do I know if my cuts are normalized?
Rotate your model and imagine if a laser could make every cut perpendicular to the outside surface of the tube. If you still aren’t quite sure, take a look at our tube gallery here.
How Xometry Can Help
Normalizing tube cuts doesn’t have to be daunting or time consuming. We hope these methods help you understand how your miter cuts will look after fabrication. If you want to make sure you’ve followed these steps correctly, review our gallery here.
Now that your tube cuts are normalized, upload your laser tube projects to our Instant Quoting Engine today!
If you have any feedback about the methods discussed or have methods of your own you’d like to share, email us at support@xometry.com!
Xometry's Tube and Fabrication Services

Laser Tube Cutting Services

Tube Bending Services

Custom Online Weldment Services by Xometry


