3D printing gets a lot of things right — this method is efficient, extremely accurate, and impressive when you consider the number of creations it can jet out. That said, some types of 3D printers tend to create models that are, literally, a little rough around the edges. It’s true that a smooth finish may not be necessary and is more about the aesthetics of the part, but if a person is holding, using, or wearing the 3D-printed part, a rough exterior takes away from the comfort and experience. Xometry offers a range of finishing and post-processing for 3D printed parts so you can get exactly what you need - specify what you need in your 3D printing quote, and we’ll work with you to get it done.
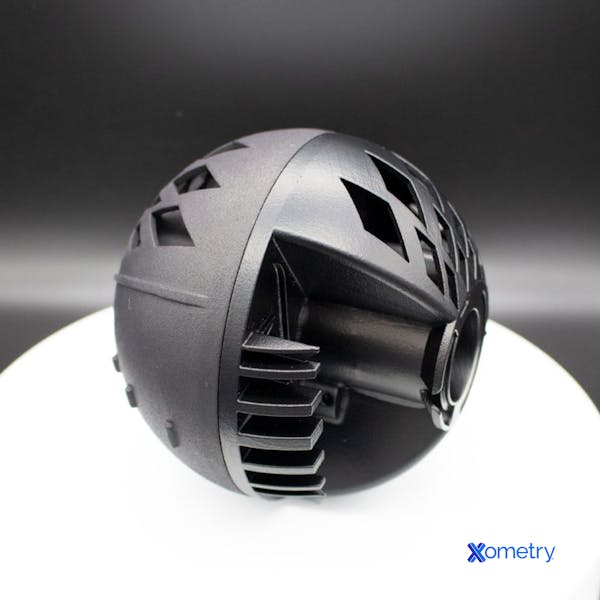
The most common smoothing process out there is painting and sanding, but there are six other methods that are worth knowing about if you want to get an unbeatable finish, like the one shown in the image below:

These smoothing methods might add a little more expense, but the extra cost might be worth it, depending on your needs. Below you’ll find all the different methods you can use and how much they’ll cost you.
1. Rely on Paint and Sanding
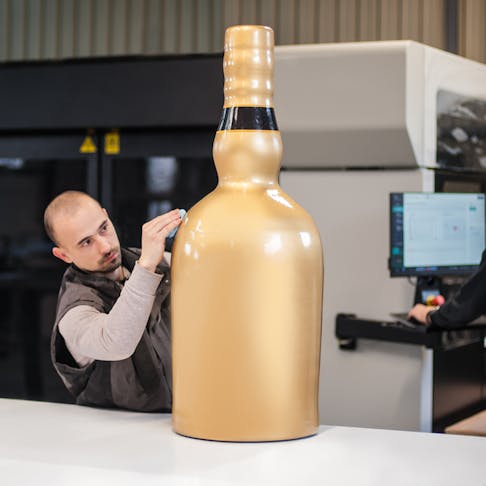
This is the most common method for smoothing a 3D-printed part. The Xometry team and many of our customers use sanding to smooth out 3D prints. Here’s an example of a sanded 3D-printed object:
Like sanding any object, this method takes quite a bit of time and attention to detail. Working your way up from a lower grit to a higher grit, you can use sandpaper to make adjustments to how the surface feels and looks—using either wet or dry sanding techniques. Once it’s in a place where you’re happy with the finish, you can spray-paint or hand-paint the model. Because of how much effort it takes, this is best for hobbyists or smaller operations that have the time and people available to do this all by hand.
Cost: Sanding paper costs just a couple of bucks.
2. Use Abrasive Smoothing Methods
There are two ways you can go about this style of abrasive smoothing—you can either tumble a 3D-printed part in a vibrating bowl with polylactic acid (PLA) or sandblast it with handheld tools or a sandblasting chamber. You’ll need to buy this equipment, but it should last you a long time and give you thousands of smooth prints. While the investment may be a little spendy up front, it’s certainly more effective and safer than some of the other options you have.
Cost: A few hundred dollars for the equipment, or you can have a service like Xometry do it.
3. Use XTC-3D Resin
This epoxy resin has been specially designed to cure at a low temperature so you can avoid warped parts—which is something that regular epoxy resins tend to have happen as they let off a lot of heat when they cure. It’s super easy to brush onto your piece and leaves a shiny finish that can be painted over once it’s cured and it won’t leave brush marks from your paintbrush. In addition to giving your print a glossy aesthetic, it will also add protection.
Cost: Around $1.75 per ounce, and one ounce covers about 100 square inches (sometimes more).
4. Break Out the 3D Gloop
This is another branded product that can be sprayed or brushed on for a slick and aesthetically pleasing surface. It comes in specific formulas for different materials, like ABS, PLA, and PET. After you’ve put it on (it’s a cinch to do) and allowed it to dry, you can sand it down and paint it. If the print’s surface isn’t quite perfect, you can always go for round two of another coat.
Cost: Around $55 for 0.113 kg.
5. Use a PVB Filament
Polyvinyl butyral (PVB) is another type of filament you can use for 3D printing that’s extremely similar to PVA, but it does tend to be much more expensive and not as easy to find. The reason why you’d want to use this, as opposed to other filaments, is how easy it is to file down after printing. All you need is isopropyl alcohol, which you’ll rub onto the model and it’ll dissolve the filament ever so slightly, giving it a smooth and shinier appearance.
Cost: Approximately $50 per 1 kg, and the polisher to evaporate the isopropyl alcohol will be around $300.
6. Lean on a Heat Gun
Not as common, but an option nonetheless is using a heat gun to smooth out your 3D-printed parts. The risk that comes with a heat gun is melting your build—you want it to be just hot enough to smooth out lines and inconsistencies without damaging or deforming the object. It’s a cheaper method than most of the others on our list, but you do have to be very careful with it. You also can’t zero in on tiny details and smooth out very small flaws, as the nozzle on most is relatively big.
Cost: From $20 to $100.
7. Chemical Smoothing
A chemical solution can also be used to smooth out surfaces. While it does work well (particularly on prints made with PLA filament), the chemicals (usually ethyl acetate or something similar) are highly flammable and can give off toxic fumes. It’s generally avoided by those in the know—especially given that there are so many other methods to choose from that don’t need you to be in head-to-toe PPE. If you do want to give it a shot, make sure you do it in a well-ventilated area and are wearing all the necessary protective gear, including a mask and gloves.
Cost: $10 for smoothing chemicals, but up to $400 for branded boxes that smooth with chemicals.
How Xometry Can Help
3D printing is just one of our specialties, and we offer a range of options to suit the exact products you’re interested in building, as well as the materials you’d like to work with. See our solutions page for a full list, but some of our services include fused deposition modeling, HP multi-jet fusion, selective laser sintering, stereolithography, and metal 3D printing. We also offer a range of finishing options to make your parts nice and smooth - you can specify these in our Instant Quoting Engine® when you get your quote.
Copyright and Trademark Notices
- PolySmooth™ is a trademark of Polymaker (Headquartered in Changshu, China)
Disclaimer
The content appearing on this webpage is for informational purposes only. Xometry makes no representation or warranty of any kind, be it expressed or implied, as to the accuracy, completeness, or validity of the information. Any performance parameters, geometric tolerances, specific design features, quality and types of materials, or processes should not be inferred to represent what will be delivered by third-party suppliers or manufacturers through Xometry’s network. Buyers seeking quotes for parts are responsible for defining the specific requirements for those parts. Please refer to our terms and conditions for more information.


