CNC Machining Design Tip: Optimizing Internal Corner Radii


It's not just standard size tooling that will help you get internal corners right.


One of the ways to save on CNC machining costs is to leverage standard size tooling.
Anytime a manufacturer can use off-the-shelf tools (vs. custom), your parts will be less expensive to manufacture. This is particularly true for tapped holes and threading, where using standard tool sizes helps save on costs.
But for inside corner radii, it may actually be better to use a non-standard radius. This is because an endmill needs clearance to turn and continue milling while tracing the internal corner radii.
For example, if a part features a radius of 0.25″, and a standard endmill is also 0.25″, then tool would need to hammer the corner, come to a complete stop, pivot 90 degrees, and then resume cutting. This method not only slows down machining speed (adding costs), but also causes vibration, which creates chatter marks.
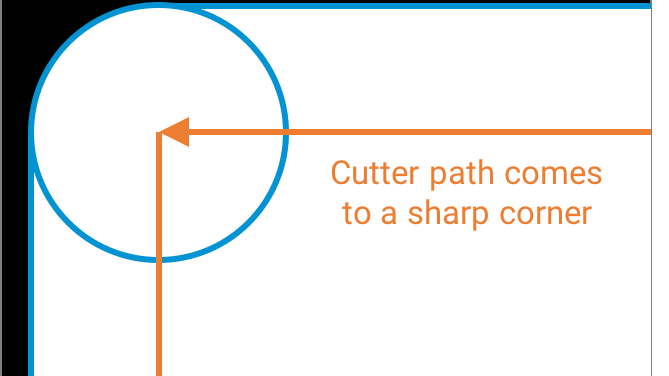
Not optimized: cutter path comes to a sharp corner
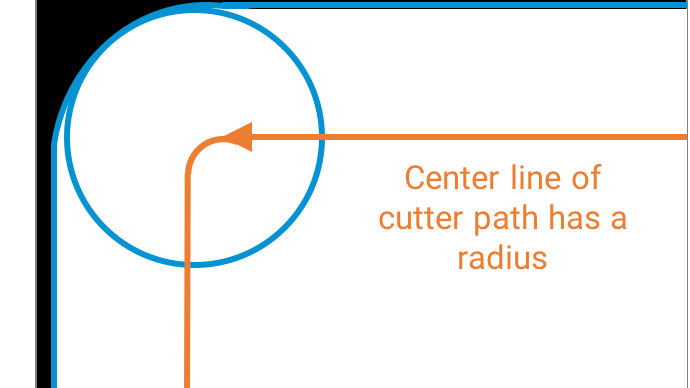
As a best practice, we recommend modeling your design with at least 0.02″ – 0.05″ added to internal corner radii, or in this example, a dimension of 0.27″ – 0.30″. This allows the cutter to turn slightly, without coming to a complete stop—like the above diagram on the right.
The result will be not only cost-savings on your project, but also improved CNC parts.
For more cost-saving tips, check out our blog post Top 10 Ways to Save on CNC Machining, or visit our site for an instant CNC quote.
FREE CNC Machining Design Guide