Used on 3D-printed polymers to even out their surfaces and give them an overall nicer aesthetic, acetone vapor smoothing is especially useful in FDM (fused deposition modeling) where bumpy surface finishes are common. This article will cover how exactly it works, the process, and what materials you can use it with.
What is Acetone Vapor Smoothing?
Acetone vapor smoothing is one of the post-manufacturing processes used to get rid of surface imperfections on 3D-printed parts that are fresh off the machine. The way it leaves a glossy and smooth finish is by breaking down the outermost layer of a compatible material (like ABS, ASA, PMMA, HIPS, PC, and any other plastic that can be dissolved by acetone—it doesn’t really do much for PLA, Nylon, PETG, or TPU). It’s a quick and easy method, and can be used on complex parts that other methods tend to struggle with as they can’t evenly remove the layers. It’s also time- and cost-efficient because it works on all areas of the part equally, instead of focusing on each area individually. This also evenly spreads out the material’s strength.
We mentioned in the intro that the method is used a lot in FDM printed parts. This is because they’re known for being a tad unstable—basically, depending on which direction they’re loaded in, their mechanical properties change. But with acetone vapor smoothing, that becomes less of an issue. The technical reason is that the smoothing creates more bonds in the z-axis and decreases strength in the x- and y-axes.
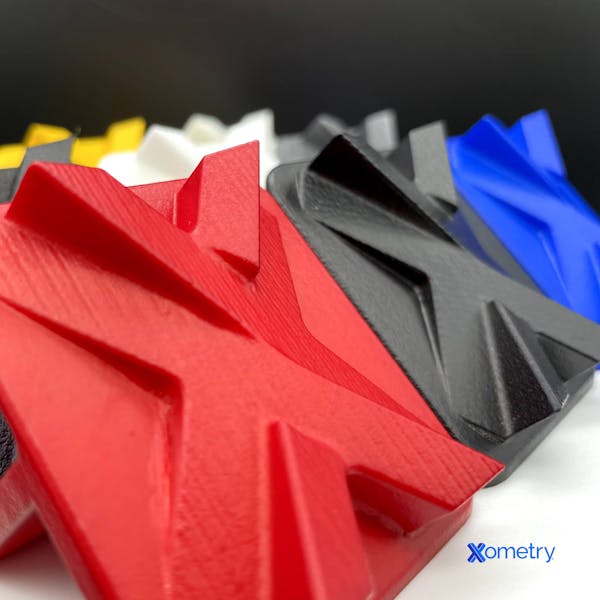
The image below shows our 3D-printed logo after having been vapor smoothed.

Acetone Vapor Smoothing: The Process
So if you’re interested in doing some acetone vapor smoothing of your own, you can follow these steps:
Preparation
To prepare, using a clean file, sand your 3D printed model and take off any majorly coarse surfaces, including those with supports. Then, you’ll need to figure out the best way to place the part in a container so the vapor can cover all the necessary surfaces at the same time and the lid closes fully. Usually, you can only do the front and sides in one go. Another important tip is to make sure the part has a base to rest on that won’t dissolve in acetone. Metal foil usually works well.
Making the Vapor
The easiest way to make the vapor is by pouring acetone into a see-through and non-reactive container (like glass), then covering it—without sealing so the acetone can evaporate quickly. If you want to make the most of the process, a helpful tip is to soak a paper towel in acetone and put it inside the container, not touching the part when it goes in.
Putting the Part in
Put the part inside the container, but make sure it doesn’t touch the liquid acetone or the soaked paper towel. If it does touch either of these, that contact point will dissolve much faster.
Smoothing Process
Leave the part in the container and let it do its thing, but keep an eye on it. There isn’t a way to calculate how long each part has to stay in there, so you’ll have to play it by ear—or eye. The size of the container, the amount of acetone, the size of the model, and several other things all have a bearing on how long it will take. You don’t want to let it sit for too long because it could start losing the detail—when the part looks smooth enough, you’re good to go.
Drying
The last step involves carefully removing the part (not letting it touch the paper towels), and setting it down in a well-ventilated area to dry, which can take anywhere from a few hours to a couple of days.
How Xometry Can Help
If you have any questions on any 3D printing processes—anything from making the parts to smoothing out their surfaces—feel free to reach out to one of our representatives who will be more than happy to assist you. We also have a large catalog of manufacturing services like CNC machining, and laser cutting. You can get started today quickly and easily by uploading your designs and requesting a free no-obligation quote.
Disclaimer
The content appearing on this webpage is for informational purposes only. Xometry makes no representation or warranty of any kind, be it expressed or implied, as to the accuracy, completeness, or validity of the information. Any performance parameters, geometric tolerances, specific design features, quality and types of materials, or processes should not be inferred to represent what will be delivered by third-party suppliers or manufacturers through Xometry’s network. Buyers seeking quotes for parts are responsible for defining the specific requirements for those parts. Please refer to our terms and conditions for more information.


