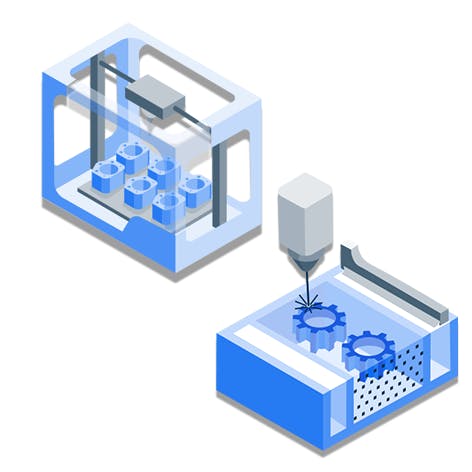
Infill in 3D Printing: Pattern and Types


Learn about the different pattern types and what they’re best for


Infill in 3D printing refers to the internal structure of a printed part that fills the space between the outer layers, providing support, strength, and durability. The purpose of infill is to balance material efficiency, print time, and part strength. The infill pattern and density chosen for a print affect the final part's weight, performance, and cost. Grid, Honeycomb, Cubic, and Gyroid are common infill types, each offering different advantages based on factors (load-bearing capacity, flexibility, and print speed). The article focuses on understanding the different infill patterns, their specific use cases, and how to select the ideal one based on the part's requirements. The reader has a comprehensive understanding of infill and how to make the best choice for their 3D printing projects by the end of the article.
What is Infill in 3D Printing?
Infill in 3D printing is the internal structure of a printed part. Infill is the material used inside a 3D model, filling the empty space to provide support and strength. A part created using FDM (Fused Deposition Modeling) has a layer of infill extruded between the outer shell layers, which provides internal support as well as strength and stability. Infill impacts the part's strength, material usage, and print time. A higher infill density increases the part's structural strength and weight but requires more material and results in longer print times. Lower infill densities reduce material usage and print time but decrease strength. Common infill patterns include grid, honeycomb, cubic, and gyroid, each offering different strengths, material efficiency, and print times. The Infill in 3D printing plays an essential role in determining the part's mechanical properties, performance, and efficiency in the printing process.


Why is Infill Important for 3D Printing?
Infill is important for 3D printing because it provides the necessary structural support for parts that are not printed with just outer shells. Unsupported surfaces without infill lead to printing errors and weak parts. Infill adds strength and stability, allowing the printed part to withstand mechanical stresses and maintain its shape. A well-designed infill strikes a balance between material usage, print time, and strength. Infill is not necessary for some parts (hollow decorative items or vases), which are intended to be lightweight and not subjected to heavy loads. Infill is essential for parts that need to bear weight or undergo mechanical stress, ensuring durability and functionality.
What is the Purpose of Infill in 3D Printing?
The purpose of infill in 3D printing is to provide structural support, optimize weight, reduce material costs, and improve part performance. Infill strengthens the printed object by filling the interior with material, preventing collapse or deformation during use. The process helps optimize the weight of the part by adjusting the density of the material, allowing for lighter prints without compromising strength. The infill density is adjusted to maximize material usage, resulting in cost savings during the printing process. Practical examples of where infill plays a critical role include creating lightweight prototypes or functional parts in industries (automotive and aerospace), where minimizing weight is essential. Durability and cost-effectiveness of some medical devices and prototypes depend on strength and material efficiency, and internal lattice or infill-like structures can play a role in these applications.
What is a Good Infill Density?
A good infill density is between 20% and 50% for 3D printing. An infill density below 20% results in parts that are fragile and lack structural integrity, making them unsuitable for functional applications. Densities above 50% lead to longer print times and increased material usage, which is inefficient for parts that do not require high strength. The 20% to 50% range strikes a balance, providing adequate support for most functional parts while maintaining reasonable print times and material efficiency. An infill density closer to 20% is suitable for lightweight parts or prototypes that do not bear significant loads. Parts exposed to moderate stress or requiring additional durability benefit from higher densities, around 40% to 50%.
What Are the Main Parts of Infill in 3D Printing?
The main structural elements of a 3D printed part related to infill are listed below.
- Perimeter or Walls: Perimeter or Walls are the outermost layers of a 3D print that form the external boundary and are responsible for the part's surface finish. Strength and structural integrity are their primary functions, ensuring the print maintains its shape and resists external forces. The perimeter helps provide structural integrity and contributes to the part's durability by reinforcing the outer shell.
- Top or Bottom Layers: Top or Bottom Layers are the layers printed on the top and bottom surfaces of the 3D print, forming a solid surface. The layers create a solid exterior, preventing gaps or holes and ensuring a smooth finish. The layers contribute to the strength and stability of the print.
- Infill Pattern: The Infill Pattern refers to the internal design of the material used to fill the inside of the part. Common patterns include grid, honeycomb, cubic, and gyroid. The purpose of the infill pattern is to optimize material usage, strength, and print speed while maintaining structural support. Infill Pattern influences the distribution of material inside the object, which affects its performance and weight.
What Are the Different Types of Infill in 3D Printing?
The different types of Infill in 3D printing are listed below.
- Line: The Line infill pattern consists of continuous straight lines that run in a single direction, providing a simple and efficient structure. Line offers minimal material usage and is often used for lightweight prints where low strength is acceptable.
- Gyroid: The Gyroid pattern features a complex, organic 3D structure that forms a series of curved, interconnected paths. Gyroid optimizes the strength-to-weight ratio, offering both flexibility and durability, making it suitable for parts that require a combination of strength and flexibility.
- Concentric: The Concentric infill pattern creates circular layers that align with the outer perimeter. Concentric is used for parts where uniformity and surface smoothness are essential, providing better bonding between the outer layers and the infill for improved surface finish and structural integrity.
- Lightning: The Lightning pattern is designed to mimic the path of a lightning bolt, forming zigzag patterns that distribute material efficiently. Lightning is suitable for parts requiring fast prints with minimal internal support, focusing on supporting top layers rather than providing structural strength.
- Triangular: The Triangular pattern uses interconnected triangles to form a strong internal structure. Triangular provides a good balance between strength, material efficiency, and print time, making it ideal for parts that need strength without excessive material usage.
- Tri-Hexagon: The Tri-Hexagon pattern combines triangles and hexagons, creating a balanced internal structure. Tri-Hexagon improves part strength and reduces material usage by optimizing the layer layout for better structural efficiency and material distribution.
- Cubic: The Cubic pattern forms a three-dimensional grid of cubic cells inside the print. Cubic provides excellent strength and stability, making it ideal for functional parts that require solid internal support and are exposed to stress or mechanical load.
- Grid: The Grid pattern creates a crisscross pattern of straight lines that form a grid structure inside the print. Grid is a widely used, reliable pattern that offers a balance between print speed, material usage, and strength, suitable for various applications requiring moderate strength and efficiency.
- Honeycomb: The Honeycomb pattern forms a hexagonal structure resembling a beehive. Honeycomb is efficient in material usage and part strength, offering a high strength-to-weight ratio. The pattern is used in applications where lightweight parts with high mechanical strength are required.
1. Line
Line infill in 3D printing is a simple and efficient pattern that uses straight lines running in a single direction. Line is used when speed and material efficiency take precedence over part strength. Low material usage makes line infill ideal for lightweight prints or models that don't require high structural integrity. The strength of a line infill is moderate, as the lines offer limited support in multiple directions. Line speed is one of its main advantages, as it prints faster compared to more complex patterns. Line infill is ideal for prototypes, visual models, or applications where speed and cost-effectiveness are more critical than maximum strength.

2. Gyroid
Gyroid infill features a complex, organic structure with interconnected, curved paths that form a continuous lattice. The pattern provides more uniform strength distribution compared to many planar infill patterns, making it suitable for parts subjected to multidirectional forces. The printing speed with Gyroid infill is moderate compared to simpler patterns like Line, but it uses more material due to its intricate structure. The material is therefore suitable for applications requiring a balance between strength and material efficiency. Gyroid infill is ideal for parts that need lightweight properties and improved structural integrity (functional prototypes, automotive components, and medical devices), where performance under stress is critical.

3. Concentric
Concentric infill features circular layers that follow the outer perimeter of the print, creating a uniform structure inside the part. The concentric pattern provides a smooth surface finish on the outer layers, improving the aesthetic quality of the print. The material offers moderate strength in the direction of the outer walls, making it suitable for parts that require a solid outer surface but do not need substantial internal support. The pattern is efficient in terms of material usage and printing speed, but its strength is lower than other patterns (Gyroid or Triangular). Concentric infill is ideal for applications that prioritize surface finish and moderate structural support (decorative objects, thin-walled enclosures, and functional prototypes), where external appearance and light support are essential factors.

4. Lightning
Lightning infill features a pattern that mimics the jagged path of a lightning bolt, creating a series of zigzag lines inside the printed part. The pattern offers a significant speed advantage due to its simplicity and minimal material usage, making it ideal for quick prints or projects with time constraints. The lightning infill pattern does not provide as much strength as complex infill types (Gyroid or Triangular), since it lacks multidirectional support despite its speed and efficiency. Lightning infill is best suited for lightweight parts or prototypes where rapid prototyping and cost efficiency are prioritized over structural strength. The pattern is suitable for application (concept models, non-load-bearing components, or decorative items) where appearance and speed are more critical than heavy-duty functionality. Lightning infill is not recommended for parts that require high strength or structural integrity under stress.

5. Triangular
Triangular infill uses interconnected triangles to create a strong internal structure. The pattern provides relatively high strength among 2D infill patterns due to efficient force distribution within each layer. Triangular infill offers a good balance between material efficiency and strength, making it suitable for functional parts that require solid support without excessive material use. The strength characteristics of triangular infill make it ideal for parts subjected to mechanical stress (brackets, frames, or structural components). The main advantages of triangular infill include its durability and efficient use of material, which reduces weight while maintaining strength. The pattern is slower to print compared to simpler patterns like Line and requires more material than some other options (Grid). Print time is less efficient for less critical parts.

6. Tri-Hexagon
Tri-Hexagon infill is a hybrid pattern that combines triangles and hexagons, offering a balanced structure that increases strength and material efficiency. The hybrid nature of the pattern provides a good compromise between solid structural integrity and print speed. Tri-Hexagon infill delivers stronger internal support than simpler patterns (Line or Grid), making it suitable for parts that require more durability without excessive material use. The combination of triangles and hexagons helps distribute stress evenly across the print, providing an optimal balance for load-bearing applications. Tri-Hexagon offers better strength, making it ideal for functional parts (automotive components, tools, or structural prototypes), while it is not as fast as patterns like Line. The pattern is used in applications where strength and material savings are essential, and print speed is secondary.

7. Cubic
Cubic infill uses a three-dimensional lattice of repeating cubes that provides more uniform strength across multiple load directions. Cubic infill delivers uniform resistance to compression, bending, and torsion due to the symmetrical geometry of the cubic cells. The typical density for Cubic infill ranges from low to medium percentages, making it suitable for functional parts that require strength without excessive weight. The Cubic infill's suitability for functional parts remains high, as it effectively supports mechanical loads in brackets, mounts, enclosures, and structural prototypes, where consistent internal support is essential to long-term performance.

8. Grid
Grid infill features a crisscross pattern of intersecting lines that form a regular grid inside the print. The pattern provides moderate structural strength, balancing material usage and part durability. Grid infill is effective in supporting parts that require medium strength, offering a solid internal structure without excessive weight or material usage. The grid structure improves part stability while ensuring relatively fast print times due to its efficient pathing. Grid infill is well-suited for applications (casings, covers, and components) that do not require extreme strength but need reliable internal support. The process is ideal for producing functional parts where a balance between speed, strength, and material efficiency is essential.

9. Honeycomb
Honeycomb infill features a pattern of hexagonal cells that create a lightweight yet strong internal structure. The design optimizes the strength-to-weight ratio, providing solid support while minimizing material usage. The honeycomb pattern is effective for parts that need to maintain structural integrity without adding unnecessary weight, making it ideal for applications where strength and lightness are essential. Aerospace, automotive, and product packaging industries use lightweight, durable components. Honeycomb infill is most beneficial for functional parts (brackets, supports, and enclosures), where a strong and efficient internal structure is required.

What is Infill Density in 3D Printing?
Infill density in 3D printing is the percentage of the interior volume of a printed part that is filled with material. Infill density is expressed as a percentage, with 0% representing a completely hollow part and 100% indicating a fully solid part. Strength, weight, and print time are directly influenced by the infill density of the part. Higher infill densities increase strength by providing more material to resist stress, while lower densities reduce weight and shorten print time. For example, an infill density of 20% is used for decorative or low-stress parts, offering a balance between print time and material usage. A 50% infill is used for parts requiring moderate strength, and very high infill densities, including up to 100%, may be used for applications needing maximum internal density in mechanical components or structural supports. The optimal infill density depends on the specific needs of the part, including its function and load-bearing requirements.
What Should My Infill Density be?
Your infill density should be determined based on the part type, its load requirements, and the material being used. An infill density of 10% to 20% is sufficient for decorative or low-stress parts. The parts do not require significant strength, and using a lower infill reduces material usage and print time. An infill density of 30% to 50% is recommended for functional parts with moderate strength requirements (brackets or enclosures). The range strikes a balance between strength and efficiency without excessive material use. An infill density of 60% to 100% is ideal for parts exposed to high stress or that must bear weight (mechanical components or structural supports). Higher densities increase the part's durability and resistance to deformation. Material choice plays a role in infill decisions. Rigid materials, such as PLA, perform well with lower densities, while flexible materials like TPU require higher densities for added stability.
A general guide for selecting the appropriate infill density based on the part's use is shown in the table below.
| Part Type | Recommended Infill Density |
|---|---|
Part Type Decorative or low-stress | Recommended Infill Density 10% - 20% |
Part Type Functional or moderate stress | Recommended Infill Density 30% - 50% |
Part Type High-stress or load-bearing | Recommended Infill Density 60% - 100% |
What is a Good Infill Percentage for 3D Printing?
A good infill percentage for 3D printing is determined by the part's intended use and required strength. An infill percentage of 10% to 20% is sufficient for prototypes or models used for visual inspection or testing. The part's shape was maintained without increasing material usage or print time. An infill of 20% to 30% is ideal for decorative objects that do not need to withstand substantial stress, balancing material efficiency with adequate strength for aesthetic purposes. Functional parts (brackets or enclosures), which require moderate strength, benefit from an infill percentage of 30% to 50%. The range ensures durability while keeping print time and material usage reasonable. A higher infill density of 60% to 100% is recommended to ensure the part withstands significant forces without failure for structural components or parts exposed to high stress, such as mechanical or load-bearing components. Selecting the appropriate infill percentage depends on balancing strength, material efficiency, and print time according to the specific needs of the part.
“Infill is often treated as a simple percentage setting, but it is a core design decision that directly affects strength, weight, print time, and reliability. Understanding how infill patterns and density interact with material choice and load conditions allows engineers to achieve performance efficiently, rather than defaulting to higher material usage.”
What is Gyroid Infill?
Gyroid infill is a complex, organic three-dimensional pattern used in 3D printing that forms a continuous, interwoven lattice structure. Gyroid infill's unique design provides more uniform strength distribution compared to many planar infill patterns, making it durable and efficient. The structure of the Gyroid pattern resembles a network of curved surfaces that create interconnected channels, ensuring stress is distributed evenly across the part. The characteristic makes it ideal for parts that require strength and flexibility. Gyroid infill is used in applications where lightweight and durable components are needed, such as automotive and aerospace parts, and in some non-implant medical device prototypes. Gyroid infil is effective when the part is subjected to varying stresses in multiple directions, providing an optimal balance of material efficiency and performance.
What is the Best Infill Density for 3D Printing?
The best infill density for 3D printing is between 20% and 50%, depending on the specific requirements of the part. A 20% infill density is suitable for decorative parts, prototypes, or non-load-bearing components where print time and material efficiency are prioritized over strength. An infill density of 30% to 50% offers a good balance between strength, material usage, and print time for functional parts that require moderate strength, such as enclosures or brackets. Higher infill densities, ranging from 60% to 100%, are recommended for parts exposed to heavy loads or mechanical stress (structural supports, tool handles, or mechanical components). The density must be selected based on the part’s function, required strength, and available material and time budget. Reducing infill density helps save on material costs and print time, while increasing density improves durability and strength.
Where Does the Ideal Value of the Infill Percentage Depend?
The ideal value of the infill percentage depends on part function, material type, weight, print time, and load-bearing requirements. The function of the part determines the necessary level of internal support. For example, a decorative part requires a low infill percentage, while a functional component subjected to stress needs a higher rate for durability. Rigid materials like PLA require less infill, while flexible materials like TPU need more to ensure stability. Weight influences the decision, as lightweight parts benefit from lower infill percentages, whereas heavier parts require higher infill to maintain strength. Print time is directly impacted by the infill percentage, with more infill leading to longer print times, which matters for time-sensitive projects. Load-bearing requirements are crucial. Parts subjected to significant forces (mechanical components or structural supports) require higher infill to prevent failure. For example, a lightweight bracket has a 20% infill, while a load-bearing tool handle needs 70% or more.
What is the Recommended Infill Percentage for Other Simple Exposure Objects?
The recommended infill percentage for simple, non-load-bearing objects ranges from 10% to 20%. The objects, which are not subjected to significant stress or heavy loads, benefit from a lower infill percentage to maintain a balance between material efficiency, print speed, and strength. Simple exposure objects (decorative items, non-load-bearing enclosures, or lightweight fixtures) do not require the high durability found in functional or structural parts. A 10% infill is sufficient for items that serve an aesthetic purpose, while a 20% infill provides extra durability if needed, without affecting print time or material usage. The range ensures that the parts are stable and adequately supported, without the added costs and time associated with higher infill percentages.
What is the Fastest Infill Pattern?
The fastest infill pattern is the Line pattern because it uses straight lines running in a single direction, requiring fewer movements of the print head and less material. The simple structure results in faster print times compared to more complex infill patterns, which require additional paths and intricate movements. The Line pattern is ideal for parts that do not require high strength or are not subjected to heavy loads. Speed is prioritized over strength in scenarios where the part is a prototype, decorative item, or non-functional component, with the primary goal being to reduce print time and material usage. The Line pattern is effective for lightweight parts, where structural integrity is not critical. The Line pattern offers a fast and efficient solution when time and cost are prioritized over durability (in creating test models or visual mockups).
What is the Best Infill Pattern for 3D Printing?
The best infill pattern for 3D printing depends on the specific requirements of the part (strength, material usage, and print time). The Line pattern is the fastest and most material-efficient, but offers limited strength, making it ideal for decorative parts or prototypes that do not need to bear significant loads. The Gyroid pattern offers more uniform strength distribution across multiple directions. Gyroid pattern is an excellent choice for parts that need high durability and flexibility (automotive or aerospace components). The Concentric pattern uses circular layers that align with the outer perimeter, offering smooth surfaces and moderate strength, making it suitable for parts where uniformity and aesthetic quality are essential. The Lightning pattern mimics the path of a lightning bolt and is fast to print, making it ideal for low-strength parts that prioritize speed over durability. The Triangular pattern provides superior load-bearing strength, making it suitable for parts exposed to mechanical stress, though it requires a longer print time. The Tri-Hexagon pattern combines triangles and hexagons to optimize strength while reducing material usage, making it ideal for functional parts that need good support and efficiency. The Cubic pattern is solid and strong, making it suitable for load-bearing parts, though it increases print time. The Grid pattern balances speed and strength, making it ideal for parts that require moderate structural support. The Honeycomb pattern provides a good strength-to-weight ratio, making it perfect for lightweight, durable parts (structural components). Gyroid, Cubic, and Tri-Hexagon are optimal choices for functional parts, while Line and Grid work well for lighter, non-load-bearing items. The selection of the best infill pattern must depend on balancing print speed, strength, and material efficiency based on the part's intended use.
Can I Use Multiple Infill Patterns or Percentages in One Print?
Yes, you can use multiple infill patterns or percentages in one print. Slicer programs offer the option for variable or adaptive infill, allowing adjustments to the pattern and density in different areas of the print. The feature is helpful for complex parts that require stronger support in certain areas while keeping other sections lighter and faster to print. For example, a part needs a higher infill density in areas that bear weight (mounting points), while a lower infill is applied to non-critical sections. The ability to modify infill patterns and percentages helps optimize material usage, reduce print time, and ensure strength is focused where it is most needed without overusing resources.
How to Choose the Best Type of Infill?
To choose the best type of infill, follow the five steps below.
- Determine the part's purpose. Identify whether the part is decorative, functional, or structural. Decorative parts require less strength and use faster, more material-efficient patterns (Line or Grid). Functional parts need moderate strength, making patterns like Grid or Triangular suitable. Structural components, which require high strength, must use patterns(Gyroid or Cubic).
- Evaluate strength requirements. Assess whether the part experiences mechanical stress or load-bearing. Choose infill patterns with high strength for parts subjected to high stress (Gyroid, Cubic, or Triangular). Simple patterns (Line or Grid) are sufficient for low-stress parts.
- Consider print time. Determine how quickly the print needs to be completed. Use patterns (Line or Grid)for faster prints, as the patterns use fewer materials and have shorter print times. Choose more complex patterns (Gyroid or Cubic) for slower prints that require maximum strength.
- Select material. Choose the appropriate infill pattern based on the material being used. Rigid materials, like PLA, perform well with lower-density infill patterns, while flexible materials, like TPU, require higher-density infill and patterns(Honeycomb or Gyroid) for added stability.
- Check slicer settings. Ensure the slicer supports the chosen infill pattern and density. Slicers offer advanced features like adaptive infill, which automatically adjusts the infill density based on part geometry, providing optimal strength while saving material.
Why Should You Use Xometry for Your 3D Printing Infill Requirements?
You should use Xometry for your 3D printing infill requirements because it offers high-quality, reliable, and customizable solutions tailored to the specific project needs. Xometry provides a wide range of infill options, allowing users to select the most suitable pattern and density based on factors (part function, strength, and material efficiency). Xometry optimizes the parts for durability and print time through advanced technology and precise manufacturing. The platform’s flexibility supports various applications, from lightweight models to load-bearing components. Xometry’s extensive network of 3D printing manufacturers guarantees fast turnaround times and competitive pricing, making it ideal for prototyping and production. Automated quoting and design feedback tools further streamline the process, helping clients receive accurate and cost-effective solutions for their infill requirements.
How much Infill Needed for 3D Printing?
The infill needed for 3D printing depends on the part’s function and strength requirements. An infill density of 10% to 20% is sufficient for prototypes, providing enough structure to maintain the part’s shape without increasing print time or material usage. An infill density of 30% to 50% is recommended for functional parts that require moderate strength (enclosures, brackets, or mounts). The range ensures durability while optimizing material use and print time. A higher infill density of 60% to 100% is necessary to resist deformation or failure under stress for high-strength components (mechanical parts or structural supports). The appropriate density must always balance strength, material usage, and print time based on the specific needs of the part.
How much Infill is Required to Achieve Maximum Tensile Strength?
Infill required to achieve maximum tensile strength ranges from 50% to 100%. Higher infill percentages, around 80% or more, provide greater internal density, improving resistance to stretching, pulling, or breaking under stress. Infill patterns (Gyroid, Cubic, or Triangular) improve strength distribution within the part, helping resist forces applied from multiple directions. Tensile strength increases as infill density rises because more material is available to absorb and distribute applied forces. The exact percentage required depends on factors (material type, part geometry, and load conditions). For example, parts subjected to high stress (structural supports or mechanical components) require nearly 100% infill, while lighter parts with less tensile strength perform well with lower infill densities.
How Xometry Can Help
If you have any questions about infill or 3D printing in general, one of our representatives would be more than happy to help. Xometry also offers a huge range of industrial-grade services, including metal and full-color 3D printing. Best of all, it’s super quick and easy to get a quote, so feel free to upload your files to the Xometry Instant Quoting Engine® to get started!
Disclaimer
The content appearing on this webpage is for informational purposes only. Xometry makes no representation or warranty of any kind, be it expressed or implied, as to the accuracy, completeness, or validity of the information. Any performance parameters, geometric tolerances, specific design features, quality and types of materials, or processes should not be inferred to represent what will be delivered by third-party suppliers or manufacturers through Xometry’s network. Buyers seeking quotes for parts are responsible for defining the specific requirements for those parts. Please refer to our terms and conditions for more information.