The Xometry app works best with JavaScript enabled!
Our SolutionsIndustriesResourcesXometry EnterpriseHow Xometry WorksBecome a Supplier
Additive Manufacturing

3D Printing Service

Metal 3D Printing Service

Solutions For Every Industry
Resources3D Printing DesignOn-Demand Webinar: How to Design for 3D Printing
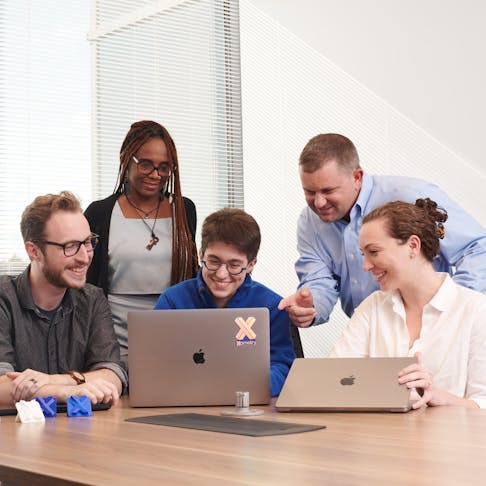
Photos of webinar participants

On-Demand Webinar: How to Design for 3D Printing

In this on-demand webinar, you'll learn about the fundamentals of 3D printing and six of the most important feature-based design tips. We'll also equip you with further resources to learn about popular printing platforms and 3D printing design.

Serena Ngoh - Xometry Contributor
By Serena Ngoh
January 22, 2021
RECENT STORIES
[Webinar Recording] 7 Pro Tips for Mastering Xometry’s Instant Quoting Engine®
March 21, 2024
 1 min read

Xometry’s Additive Engineers walk you through what you need to know to design great 3D printed parts and print them with a 3D printing service. This includes 6 of the most important feature-based design tips, an overview of the differences between manufacturing technologies, and how to get file types like STEP and STL straight. If you’re looking to diversify your traditional manufacturing stack or build upon your current 3D printing knowledge, this is the webinar for you. 

Agenda:

  • Overview of 3D printing platforms: platform selection guide and platform detail resolution
  • Fundamentals of 3D Printing: feature orientation and mitigating supports
  • Six feature-based design strategies: Minimum wall thickness, clearance between features, remove confined hollows, fillet everything, be mindful of cantilevers, design with even walls
  • STLs, STEP, and file preparation
  • Resources and Live Q&A

Speaker Biographies

Colton Bamford, Senior Additive Shop Engineer

Colton has over 5 years of experience in additive manufacturing and has a degree in mechanical engineering from Lafayette College. Colton is passionate about exploring the possibilities of 3D printing and specializes in SLS and FDM 3D printing. Previously, he worked as a 3D printing engineer for Shapeways in their SLS facility and now heads Xometry’s additive shop operations.

Tommy Lynch, Senior Additive Application Engineer

Tommy has over 15 years of hands-on experience in additive manufacturing with previous experience at Protolabs and FineLine Prototyping. His specialties are stereolithography (SLA), selective laser sintering (SLS), fused deposition modeling (FDM), and direct metal laser sintering (DMLS). He can handle any special requests when it comes to materials, processes, finishes, and production requirements.

Greg Paulsen, Director of Application Engineering at Xometry

Greg Paulsen leads the Applications Engineering team at Xometry, working directly with customers on special case projects. He’s an expert in all things manufacturing, from 3D printing to CNC machining, to injection molding and beyond. He works day in and day out to not only guide customer projects but also create design for manufacturing resources.

Full Transcript

Serena Ngoh:

We're going to go ahead and get started. We have a team of expert 3D manufacturing experts to present to you today with tons of content, so we're going to get started. Thank you so much for joining Xometry's Live Webinar today. We'll be discussing 3D printing design strategies, file preparation, processes and more. First, let me introduce myself. I'm Serena, and I'm on the marketing team here at Xometry. I will be facilitating the webinar and helping out at the live Q&A at the end. Speaking of which, please submit your questions throughout the webinar in the question box for your panelists to answer at the end. I'll be monitoring these as they come in, so please feel free to submit them at any time.

Serena Ngoh:

After the webinar, we'll be sure to send you a webinar recording to rewatch or share with your colleagues, so look out for that tomorrow. And then if you stick around until the end of the webinar, you'll receive a special discount to use in our quoting engine. Now, I want to introduce your panelists, your 3D printing experts. The first one is Greg Paulsen, the Director of Application Engineering. There's Greg.

Serena Ngoh:

He brings many years of experience and leadership to our team here at Xometry. He's an expert panelist and speaker on all things additive as well as subtractive manufacturing. He works day in and day out to not only guide customer projects but also creates great design for manufacturing resources. You've probably seen him star in our Will It engineering challenge videos. We're still making those, so look out for more.

Serena Ngoh:

Next, we have Xometry's, Head of our Additive Shop. He is Colton Bamford and he's on the ground day to day looking at your parts and optimizing them for the machines. He has over five years of experience in additive manufacturing and has a degree in mechanical engineering from Lafayette College. He's passionate about exploring the possibilities of 3D printing and specializes in SLS and FDM. Previously, he worked as a 3D printing engineer for Shapeways in their SLS facility and now heads Xometry's Additive Shop operations.

Serena Ngoh:

And finally, we have Xometry's Senior Additive Application Engineer, Tommy Lynch. Tommy has over 15 years of hands-on experience in additive manufacturing, with previous experience at ProtoLabs and at FineLine Prototyping. His specialties are stereolithography, SLS, FDM, and DMLS metal 3D printing. He can handle any special requests when it comes to materials, processes, finishes, and production requirements, so please don't hesitate to send him any challenging questions. So thanks again for tuning in and don't forget to submit your questions throughout the webinar in the webinar question box. All right, I will hand it over to your speakers.

Greg Paulsen:

Hey, Serena, and thank you so much again for all you do as well. Just a heads-up for those listening, if you are working with Xometry and you have a really cool story to tell, Serena also does the case studies here at Xometry. We always love to show off parts because usually, we don't, where everything we work with is confidential, so when there is a great story to show off a really cool additive application, I'm just throwing promotion out there.

Greg Paulsen:

Also, you may see a random kitten walk by on the camera here, so we also have a guest star named Coco who is a 13-week-old kitten who does not know boundaries. So I'll try to keep her from accidentally typing stuff in the chat box while we keep running. I'm really excited about this team. I am really excited to have Colton and Tommy onboard to talk about design for 3D printing. These team members are crucial and vital to Xometry's additive infrastructure, so if you are submitting a quote or have questions, a lot of times that's going to be Tommy or his team members that will actually be answering and working with you on a consultative manner. Tommy also does a lot of the manual reviews in more complex projects.

Greg Paulsen:

Colton is a doer. He comes from making parts and he makes a lot of parts and ships them, and so his goal... We were talking about this nature of, "Can it be prepared, print, pack, and ship?" He brings perspective of design from a practical standpoint. "Can I make it? Then, can I make it again?" And so having this perspective on not just like what can the process do, but what really works from practical experience I think is going to be really cool.

Greg Paulsen:

Today, we are going to talk about design for 3D printing. Our agenda, we had some introductions here. We will be going through some fundamentals, so why choose 3D printing? Talk a little bit about processes that we're experienced with and that we run here at Xometry, and some of these foundational needs that are involved with every 3D printing process. And then, we have some very concrete rules. Minimal wall thicknesses, feature clearances, removing confined hollows and spaces where material could be trapped, fillets, cantilevers. Then, we're going to spend a lot of time with question and answer.

Greg Paulsen:

As Serena noted, on the GoToWebinar platform, you have a chance to input your questions in the questions tab at any time. Please put that in. We're going to try to get to as many as we can. Well, we got a lot to cover, so I'm going to keep on running. So talking about the fundamentals of 3D printing here. So why would I even choose it? Why would I use 3D printing over a traditional manufacturing process like machining or molding? When 3D printing came out some of us were a generation ago, a decade-plus ago, we all knew it as RP, That is the Rapid Prototype Machine, because I can make something quick. I could just make something from CAD to tangible reality and it overnight oftentimes, and there's no minimums, I'm not tooling up where it makes more sense for me to build like, 11 or 11,000 at a time I can just build one-offs iterate my design and move through.

Greg Paulsen:

So a lot of the work that you see it started with 3D printing is that rapid prototype work. And it also just has a very low barrier to entry. The only thing required for making a 3D print is CAD, so that's 3D CAD models. And all that can be interpreted by the build preparation software to make that 3D printed part. It's also very low cost because you're essentially just paying for the space that you're reserving on that print platform. And again, because it's just taking that CAD, preparing it and going directly to a generic platform is going to make it 3D shape. There's no specialized tooling for this process, it's all digitally done. And finally, what we see graduating is once you go through that rapid prototyping tend to start thinking about how can I integrate this into my supply chain?

Greg Paulsen:

Like, how can I make real end use components? Maybe I'm working on the next project design or iteration of something that I've been sustaining. And there's a lot of freedom with 3D printing. I can make parts, with a just in time production method. I could integrate many features into one single design because I have a little bit more design freedom. We'll talk more about that. And on that there's just less rules. The access is usually my rules. When I talk about traditional things like, sheet metal brakes or machining, where can I get a tool out there to make that feature? You think a little bit differently as you're generating a part from smaller materials to build a part from bottom to the top. And some of that is organic shapes, lattices and building internal structures that you just couldn't make traditionally.

Greg Paulsen:

So I'm going to go very quickly over this. We can talk more about this in Q&A, if there's any specifics on these technologies, but we offer a lot of additive manufacturing technologies and we've done entire webinars on just one at a time. So get ready for the showcase here. We offer seven additive manufacturing technologies here at Xometry, from photopolymer processes. And that'll be like our PolyJet material or things like stereolithography, very common for prototyping to Powder Bed Fusion processes, where you start with a powder of material, a plastic or metal, and fuses together to make a really complex generated shapes like selective laser sintering, HP Multi Jet Fusion, which are some of our more common 3D processes, as well as direct metal laser sintering, which is using a powder metal and fusing that with a laser.

Greg Paulsen:

We also have extrusion processes, so processes of taking a filament of material and melting that out and kind of zigzagging back and forth. That would be something... There'll be this, process here, fused deposition modeling. A lot of times if you're running a desktop 3D printer, you're probably used to that actually see Colton, in the background there, he's got a little Prusa hanging out. We have the industrial versions. Yeah, we have the versions that can run big parts, long builds with low error rates for them.

Greg Paulsen:

And finally we have some processes that are just designed for polymer production, Carbon DLS, it can make parts very quickly. It's really, really good when you're making a lot of small parts at once. So we have a little bit of everything and that means there's a lot of decisions to make, when you're talking about these processes and again, this is a webinar itself, but I wanted to have this slide here.

Greg Paulsen:

We can go back with the recording, pause a little bit, but a lot of times why you choose a process is kind of where your head space starts when you're thinking about where I am in my product development cycle. So am I in a rapid prototype stage? Am I making a concept model? Is this going to be in applied end use production? So for example, if I'm doing a concept design and it's going to be for something more cosmetic, it's going to represent a lens or a clear case.

Greg Paulsen:

And eventually going to injection mold. I may take this route where I'm going for aesthetic prototype here. I have a clear material, and I know that these materials that are come through stereolithography or PolyJet are great resources, including this accurate ClearVue. This is actually the quick clear finish that we have, which gets a really nice translucency to it.

Greg Paulsen:

But I also may take other routes. If I'm doing something to end use, maybe I'm making a part that it's functional. It's got to be plastic. Don't want it to be flexible like rubber, but man, it needs to have heat deflection above 150 Celsius, and we have options for that. So a couple processes come to mind there, like a Fused Deposition Modeling where we can 3D print an ULTEM and we have three ULTEM materials available for that.

Greg Paulsen:

And then Digital Light Synthesis, that Carbon DLS process. We have a material called cyanate esters both have very high heat deflections. And if that's what you need, there's options available for that. The one other thing to note here is again, setting the Headspace for 3D printing and designing is that platform size can actually be a consideration, unlike traditional machining and processes is where I can kind of access and go around my material to make these features with additive.

Greg Paulsen:

A lot of it's enclosed and in that enclosure is going to be what I can make so that's my build area. And you can see that some of our processes like, Digital Light Synthesis DMLS, caps out at nine, there are always exceptions. This is general rules, believe me there are larger platforms out there. SLS and MJF usually around, 12, 13 inch part is a good idea of like that or smaller, SLA can actually build up to about 24, 27 inches. And FDM has the largest standard use platform at 36. And Colton knows that very well because he has a small army right behind that wall there of those Fortus 900 machines.

Greg Paulsen:

The other thing to note, so not just platform size, platform resolution platforms available is when you're thinking about 3D printing, also think about that detail level. When I look at these different platforms and materials, usually there's powder bed, something that has a laser that's focusing and fusing powder together. I always think Sharpie, I think Sharpie Fine Point because it has great fine edges, but if you get it too close and you make like a little circle, sometimes that bleed will fill in that circle. And that's kind of the process that you see with laser bed processes as well. When you're thinking about detailed resolution with some of these photo Photopolymers materials like, DLS, PolyJet and SLA, it's more like a Sharpie pen where it does have a finite lift to it.

Greg Paulsen:

There is still pixel resolution to it. But it does have nice clean edges and you see that on the smoother surfaces of those parts. And lastly, FDM, because it is extruding, I was going to say crayon, but that's not giving you it's justice. Because you actually can get some good resolutions and very good details out of parts. But it is definitely, it's a finite width of that filament and it's filament. It can't make sharp turns. So you're actually kind of layering it next to each other. So I was thinking, this is a markup pencil for drafting at 1.1-millimeter pencil. But imagine that's like the pencil combined with a Tron bicycle where it can actually scribble in the light, it just has to go beside each other. And that's just some good concepts to get your mind space around. When we're thinking about like, what am I doing in CAD? How it will show up in reality.

Greg Paulsen:

The last thing, and then we'll move into more design concepts with our team here is that, the process is layer by layer. I am generating my part based off the features that were just made before it, so I'm stacking my features on top of each other. This is going to become really important as we start talking about design concepts, like mitigating support structures, that 3D printers, each one of them is different. I showed you the resolution we showed all these different platforms, printers are doing their best, interpret the 3D CAD data that you get and making that shape through their build preparation software things like holding a tight tolerant edge on one feature and everything else, having a different tolerance. It's not quite how you approach additive manufacturing.

Greg Paulsen:

All this comes down to design intent and understanding that sometimes if you are looking for a very tight tolerance feature, it may be an iteration so highly repeatable, but the first goal is usually those global tolerances that net shape that the 3D printer produces. And the other thing is because I am generating this, I don't need tooling, if I do have features that are overhanging or cantilevered off of that part, they're going to succumb to gravity. And so if I just deposit material and there's nothing underneath, they'll just fall to the ground and I don't have my feature there.

Greg Paulsen:

So I build support structures that are sacrificial platforms for my materials to be deposited on top of, and then those are removed after the print. Sometimes support structures are more prominent, depending on the process, but you may see some of that slight grid-like stipple, when support structures exist. So I'm going to move this Colton now, because Colton, this cool example here, you kind of designed a headache in a nutshell. But this is getting the mindset of as I'm designing orientation does make a difference, right?

Colton Bamford:

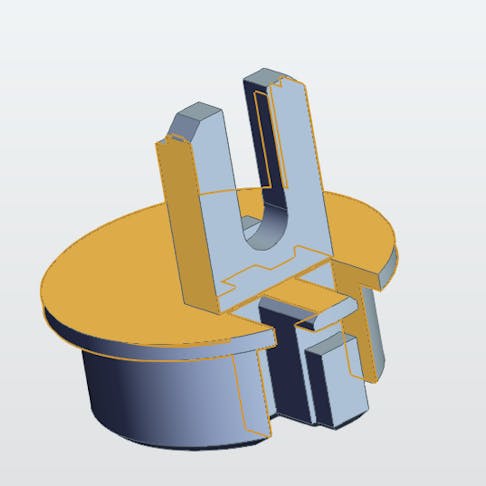
Absolutely. Yeah. Thank you, Greg. I actually had a wonderful time building this part, drafting it the other day. I got to sit down at a computer and wonder how I could make my team's life miserable if a part came in. So this is a great example of what I called. You can't have your part and tolerance it too. So this particular part has a couple of key features on it. You can see in that isometric view there, we have text, snap features on the bottom, pins on the top and a through hole. You can kind of see all that with all the views that you have here. So if we get this part in our shop, you've gone through, you've ordered your part, we get this there's no drawings, no part notes, no guidance. We get to play detective of what we think this part will do.

Colton Bamford:

We have a couple options for how we can print this. So thinking about orientation, like Greg said, "It's a bottom-up process." So what phase are we putting on the bottom and why? So on the left hand side here, highlighted helpfully. Thank you, Greg. Maybe just print it exactly as the file was submitted straight up and down. This will give us great resolution on the pins on the top, but that's kind of about it, because materials are anisotropic, they don't exhibit the same strength in every direction, especially in some of our processes like FDM, the filament we were talking about before, because of that, those snap features on the bottom were printed in their weakest possible orientation the Z-Plus. So they're actually going to separate on their layers as soon as you try to snap this thing onto anything.

Colton Bamford:

So, okay. You want to keep the snaps strong, let's try number two. So orientation number two, laying down it's flat back this time, we get really nice, clear text that was kept in the XY and the snap features were kept in the XY. So we're going to get maximum strength on those, of course, because this is a headache of apart. You won't have proper roundness on the pins on the top or the through hole on the side because of how printers print they're less accurate generally in the Z direction than the XY. So you're going to see kind of ovular shapes, for any holes oriented in the Z plane. So moving onto the next one, maybe that through hole is the critical, and you're probably starting to see the flow here. You're never going to get all four features [crosstalk 00:18:32] properly resolving on this part on this design.

Colton Bamford:

Yeah. That's why it's the nightmare part. So on the side, maybe that through hole is the critical feature. You need this thing to slide onto a rod and be a little tagged to read. Great. So you get your through hole perfectly round, but what were those pins and the clip features on the bottom and intended for? And then finally we have what I call the chaos orientation, which is kicked off at a 15 degree angle in the X and 30 degrees off center in the Z, we see this a lot in our powder base processes where they're not printing with support structures underneath they're printing fully supported, like an SLS or Multi-Jet Fusion, and this is kind of best and worst of all worlds. So everything is kept in an X, Y plane for strength, but also you do get layer stepping on the surfaces because bottom up process.

Colton Bamford:

So this is a great example of a physical part that could come in that if we didn't get any guidance from the customer end you guys saying, "Hey, I really need the text on this clear and the rest isn't as critical, or these two pens on the top are mission critical. They need to be round. We can't go in and we machine them later," that kind of feedback we can use and use our expertise of okay, how do we preserve those features? How do we use that guidance that you've given us? I have a special place in my heart for this part. Now that I've made it

Greg Paulsen:

Colton, you did really good here on creating a part like the ambiguous part because of how the features are oriented. And I think what's really cool. What's really interesting about this is hopefully throughout this presentation, you'll realize that if you are designing a part for additive manufacturing, you'll avoid these pitfalls. And I think Tommy has a really good point on this. Like, how do you suggest orientation? Like where usually you're caught in who's doing bill planning or has planners on his team. They're looking at features of the part, usually if we see nothing that tells anything, or prioritizing function over detail like clips, for example, because we assume that you're probably going to clip your parts immediately after opening the box. But there's also ways in your design intent to really show, Hey, this part is made to go this direction. And we see a lot of times that's just intuitive, so Tommy I'll leave it to you.

Tommy Lynch:

Thanks, Greg. And I do feel the need to acknowledge that part that we just showed, there are a few people on this webinar that we had that exact conversation last week, and yes, the part was inspired by that conversation. As I said, then in the world of additive, a lot of times there's a hundred ways to do it, right. It's just a matter of knowing what the most critical features are going to be. And so when we talk about getting into mitigating support requirements through design, I'd say that this is primarily going to apply to especially metal printing, Carbon DLS is very much a design for the process. And then also, other laser-based systems or UV photopolymers, PolyJet and SLA they're going to be sensitive to support as well.

Tommy Lynch:

But when you're thinking about adding supports to a part, there's typically three main functions. And let's say, if I'm building this model of my hand, one function of supports in a liquid based system is it's a fixed string point because when you build this first layer of my fingertips, they need something to hold them in place so that they just don't float away. So they're a locational fixture. The number two function is specifically in the realm of plastics. When you have a plastic that is partially cured or is slightly molten. If you take this part and you build a large overhang, then it just wants to sag, gravity is working against your part during the build process. So the support structures are exactly that, they're support trellises to keep things propped up, so that there's a good platform for the layers to keep stacking on top of each other.

Tommy Lynch:

And then the third thing is in the case of metal printing, it's actually a little bit opposite. When you're printing in metal, you're basically taking thousands of 30 micron layers of powder that are instantly being taken from room temperature to molten, to rapidly cold. And every layer wants to curl up like a taco. So the supports in this case are actually anchors to keep it held in place so that it doesn't collide with the coder blade or so that she can get some level of reasonable accuracy. And with all that said, at the end of the build, you have to think about can those supports actually be removed.

Tommy Lynch:

So in this example here, I think it does a really good job of highlighting how orientation can affect the amount of supports that are required. And if you look at the one on the left, I mean, yes, you can print a part in that orientation, but you're going to have a lot of work to remove those support structures by hand. And if you look at those intersections, those are going to end up being knobs that are about half to three quarters of a millimeter that are standing proud of your critical surfaces that you have to go in and cut off with an Exacto knife or sand away, or if it's a metal...

Greg Paulsen:

Have a nightmare. Yeah. Oh, Tommy.

Tommy Lynch:

Would help you. Yeah, it's grinding wheels.

Greg Paulsen:

Yeah. Sorry, Tommy. You cut out for a second there. You're back.

Tommy Lynch:

Okay. Yeah, I was just saying if it's metal, then you're getting into Dremel tools and grinding wheels and they get a little bit squirrely when they're getting close to your critical surfaces and you're trying to remove material. So on the right-hand side, you can see this part was pretty optimally designed for additive manufacturing, if you turn it in the correct orientation. And the key features are that you've got a lot of rounded surfaces, a lot of angles, and just enough relief there, so that as the layers are stacking, there's going to be an adequate overhang or the overhangs of each layer are not going to exceed the threshold for requiring supports. So at the end of the day, all you have to do is build a full plate of these things, pop them off the build tray and rip away one strip of supports, and you're getting real close to a good production solution.

Greg Paulsen:

Yeah. And actually I have that part right here, the CLS part, and it is nice because the only place where you can see where there's visible support features, essentially the extended bars and even the bars has some design intent in that where it has a flat where it accepts the supports there. And this one's been pretty well iterated and designed on, but that little flat is there because it makes it easier to post sand the support structure off. So you're not kind of guesstimating on a curved surface there. And I think I want to note too, is these kind of leading in and self-supporting features. So if this part was just jag it across here, you'd have a supporting feature, but just adding a little rib makes all the difference in how this part grow naturally here.

Greg Paulsen:

And it's the same concept when you think about how lattice structures are just so powerful in 3D printing is they actually create self-supporting features on themselves here. And something that 3D printing can do very well as it stacks those features of the previous layer. Just note that if you have lattices like this great, great teardrop shapes, great flats on top you'll see it. And in fact, you'll see a lot of a topology optimization software that shows like near level to the platform parts.

Greg Paulsen:

But if you really looked at the quality, like took a microscope up and looked at the quality of how those near parallel structures are compared to the ones that are a little bit at an angle, you'll really see that they're rough on the edges there. If you have a hex, turn it sideways, keep the pointing hip up. So speaking of yeah, we're going to move into this. And again, we have so much to cover and I'm seeing some questions coming in, which is absolutely awesome here. But we have just some plain rules and the first one, again, Colton, we just like to send you headaches. So I'm going to give you the first headache to talk about, but how it could be mitigated too.

Colton Bamford:

Yeah, I really liked that part you were just showing that DLS part. Whereas if I designed a nightmare, you were almost making like a beautiful, nice dream everything was rounded.[crosstalk 00:27:42]

Greg Paulsen:

The generative optimized version this is a software optimized, so a little bit different than the design, but yeah.

Colton Bamford:

I'd love to see those come through. Yeah. We do have a couple of rules, and they can be a little counterintuitive or if you just read numbers, you're like, "Oh, great." Okay. So the bottom number, I can make a wall that's 0.6 millimeters thick. I just want to say from the bottom of my heart, please, no. So the number one reason for parts being placed on a production hold where we can't move forward with them is thin walls and additive. So you can spin cut all day long and make your 0.1 millimeter thick walls. And yeah, that 3D model exists, but we're not going to be able to print them or post-process them for some reasons. So these are not just randomly picked numbers. These are from experience from the limitations of the machines. And obviously because we're talking about seven processes in one, their ranges each one is specific and we do have the information pages for each one that'll tell you what kind of thin walls you should be looking for.

Colton Bamford:

So right off the bat, one of the key distinctions is thin walls for supported or unsupported features. So this part that Greg made is a really great example of that. So he's able to push a PolyJet part all the way down to 20, 000 wall thickness as he's highlighting here that thin wall at the top, that is not a light reflecting off of that, you're actually seeing the light shining through the part. So because that wall is surrounded on all four sides and held in place, it gets the added strength that allows it to survive printing and post-processing, it's at a nice, beautiful, gentle, sweeping angle. So just like we were talking about before each layer has a solid, positive grip on the one below it. And then as he makes them steeper or less supported, we kick it down into thicker walls, so that's a great example. And even on the front of this part, it's like a multi-tool of printing examples-

Greg Paulsen:

This is a test challenge part, so it was designed to push limits. So this is just for Colton's defense. This is a lower than minimum recommendations here.

Colton Bamford:

Yes. So on the other side, we see another great example of supported versus unsupported features. So the fins on the front of the part, the thinnest at the edges are supported. They're making a nice L shape or a T shape. So if you're thinking of cross sections, X's, T's, O's, C's, anything that basically crosses out of one dimension to two, so it can support itself, take a little bit more of that force. The opposite of that would be a pin, something protruding straight up out of a part so that's where these two different ranges of numbers come from. So the giant thick one in the center is unsupported, but it's also, 160,000, it's a much nice, more robust. And we actually saw great resolution when we printed these because we printed quite a lot of these in a lot of different materials.

Colton Bamford:

So when you see that range of 0.6 to one millimeter, that is four things that are self-supporting, they're held in place by the geometry. They can take a little bit more of the forces involved in printing, and post-processing, if you need free floating things, pins, tabs, things that need to stand on their own and withstand the test of time. You're going to want to bump it up to 1.2 to 2.5. And one thing that we do want to say, "Minimums are minimums." If you can give us more, we certainly appreciate it. And you're more likely to get repeatability. If you order one of these within walls, it might turn out fine, but what happens when you order a hundred or a thousand and the post-processing is more demanding.

Greg Paulsen:

Yeah. And I was going to say on that, there's... I always use the brake example, right? So like, we talked about minimums. No one goes to buy the thinnest brake possible for your car. So yeah, they're giving us a little bit more beef, but even on 3D printed parts, a lot of times there's kind of a maximum like, three to four millimeters is probably plenty enough for wall thickness too.

Colton Bamford:

Yeah. So this is another great example of what kind of functions you can get from parts. So this is a really nice actually, Greg, I don't know if you have this part with you, but this is a really nice mesh part printed in MJF, and the whole thing is intended to move and interweave with itself and be a fabric. And when designed well, as you can see, it is a beautiful fabric. And one of the reasons that it's able to print like that and stay contained, but still moveable is that it has the proper size usable gaps. So our processes like Greg was saying, they're approximations as they're printing. So if you have a 0.00001 millimeter gap between two parts, CAD separates them as two parts. But when the printer goes to create that the material is going to overlap, you're going to get like the bleed of the Sharpie.

Colton Bamford:

It's going to start centering into the part next to it, or fusing into the shell next to it. So we recommend a 0.5 millimeter gap. And one important thing to note, if you're doing like a pen inside of a circle, that's a gap on either side. So every gap where material can't be, it needs to be half a millimeter, otherwise you risk not being able to clear the material out of it. And post-processing, if there supports or things like that, or the bleed over that makes your fabric part into a little sheet of plastic that isn't going to work the way that you want.

Greg Paulsen:

And I don't have an example for this, but I can tell you there's some really neat kind of cam like features that you can make when you have that 0.5 millimeter gap when it's twisted in one position, but when the action happens, we twist it back in place. There's enough of like, oblong feature to that. So it's not completely cylindrical that it actually will self tighten to the right tolerance is right function you need, so there are ways in your design intent to actually make it so you can print features that have the right design roles, but still have the functional goals that you're trying to get to. That being said, sometimes it just makes separate parts and integrate them together. We can get creative sometimes, like this is a really fun project to work on.

Tommy Lynch:

And one thing about the gaps, would you agree that's typically going to apply to the powder based technologies such as, SLS or Multi-Jet Fusion, especially if you're going to have a good bit of articulation primarily, because they don't use support structures.

Colton Bamford:

Yeah. That's another great point. And actually perfectly talking about material removal. So, SLS and our powder based, they print fully encased in powder if you're unfamiliar with the process, and then you get to Indiana Jones archeology then out of their powder bed and clear all the powder out, but there are logistics involved in that. So designing for material removal, if you print something that is completely confined, think like a sealed soda bottle, and it's not a beautiful self-supporting structure on the inside, it needs support material, or you're printing it in something like SLS that prints totally encased in material. We're not going to have any way to get that support structure out of the inside of it. So this applies to narrow gaps like you see here, or totally confined hollows, or even in some of our non soluble support structures like, an FDM, some of our materials are soluble and we can throw them in a sodium hydroxide bath and get all the support material out, but other ones need to be manually removed.

Colton Bamford:

So that means, pliers picks all the way up to DMLS supports. Like Tommy was talking about where you're, getting the Dremel and the grinding wheel out. So there are a couple rule of thumb obviously every geometry is different, but rule of thumb guidelines for escape holes, ways to get that support material out. If you know you're making a confined hollow, given an escape hole every half of an inch and make the hole as big as you can to get material out. I've seen customers that thought their part was totally unprintable. And we said, Well, actually, if you just put a few half inch holes in it here and hear that you can go back and plug with off the shelf rubber plugs later, we can clear it out every time make as many of these as you want. So giving a way for material to get out once it's put down. So we lay the foundation of material needs to go down layer by layer. It's a bottom up. And then some of that material needs to get its way out. So this is a great way to keep that in mind while you're printing.

Greg Paulsen:

Yeah, It's the prepare, print then process side of things there. Yeah.

Tommy Lynch:

And I'll add one more comment that, I'd say that it is not uncommon to have a customer to submit a part that's completely hollow. And a lot of times it's for cost savings because in theory, if the machine doesn't have to draw a full basketball of material, because they really only need that outer shape, then they may say, "Well, just leave the support material in there. I'm not really concerned about it." I'll say specifically from FDM, when it comes to confined hollows, it's pretty common where customers say, "I'm fine with support material being in there." But one of the biggest issues with that is that when these parts are dunked into a bath of solvent to dissolve out the support material on the down facing surfaces, then that also penetrates into the internal cavity as well. And so you will have a part that's forever leaching, a greasy not so desirable substance.

Greg Paulsen:

I had a customer print a blimp and we went back and forth and they're like, let's just go with for it. And this is an SLS. It became a perpetual salt shaker for them because they had a small little perforation and no matter... And so every time they handled it, just like a little bit more powder came out. And one of the things about ample holes like exit holes as you need, entrance for clearing, and then you need an exit for clearance. So I could shoot air gun, or I could beat blast into that feature.

Greg Paulsen:

And there's a place for all that powder that I'm trying to pack away in pack out to actually exit through. So don't make a part of salt shaker is our point there. And it's easily mitigated. And even as Tommy said with FDM, I have infill options. So I can do a little bit different where I could actually change the... I can reduce the material usage of something that has large internal volume by changing the way that I am actually extruding the material into that part. Tommy, just a segue into a little bit different, but just talking about how fillets are your best friend in 3D.

Tommy Lynch:

Right. And I won't really spend too much time on this, but with 3D printing, there's adding fillets or chamfers to transition from one feature to another. It just makes things a little more stable, a little more durable. And one explanation I'll give is that if you are building a barbell, which we might discuss in a future slide, you got a thin post. And then it transitions to a flat part, having that smooth transition to limit the cross-sectional surface area per layer change just makes a more stable part.

Tommy Lynch:

It gives it a better platform to build on, and it's going to increase your durability. And it's not going to be as much of a shock when you go from thin rod to bam. There's a big flat piece that's trying to adhere to that. But outside of that, I'd say that adding a filleting or rounds to any surfaces is going to give us also more options for build orientation as well, because smoother features are easier to orient.

Greg Paulsen:

Yeah. And just something to note too. And I actually, probably, if I was adding something in a slide, I talk about knife edges. But one of the things fillets do is they create a consistent print, all our processes when we go back to that Sharpie, whether it's a fine point or pen, or like a pencil there, all of them do curve the edges. I mean, they'll get some are much more accurate than others. But if you are designing in a fillet or say you have... Or say you don't, and you have a knife edge there, you're leading that up to a little bit of an additive chaos moment, but depending on the orientation, as well as literally even things like, the actual powder formation, that's being centered together on that feature, because you created it infinite point, like at an acute angle.

Greg Paulsen:

So adding a small round or adding a chamfer or a knife edge is for example, can significantly increase the consistency, like part to part, to part for that exact same feature, it'll create your expectation. If not, then you're essentially working in the invisible where sometimes it'll work sometimes it will survive and chip. Sometimes it may chip. And so that's why fillets are just so powerful, also a cameo here, that's exit hole there's a little internal pin feature there. And so if this is being the holes on the bottom side, and this allows the material to be evacuated on that part.

Greg Paulsen:

So it's funny. When we did this presentation, we set up, I put this picture of the Cassini model, which NASA released 3D STL's of a bunch of their space probes. I think they released in 2013, but I started seeing a lot of movement around 2015. I think it just got picked up on social media somewhere. And each one of us had a story about a time where we had to print this exact Cassini model, which I thought was kind of interesting. But this is about Cantilevers. So Tommy, why can't I just print this part with the antennas on it? Let's talk about that.

Tommy Lynch:

Right? I'd say, at least once a month, I end up in a situation where I'm trying to help a customer provide DFM on their project. And they have followed all of the design rules for minimum wall thickness, hole sizes, things like that. But then we see something like this, and it's like, "Please don't make me do this." And the reason for that is you've got a block of material with an extremely thin cantilever hanging off the side that it will print. It will absolutely print, but the problem is in the case of SLS, once you start excavating it from the powder bed, all you have to do is tap that piece that's hanging off the side, and now we've got a broken part that we could rebuild 10 different times. And all you have to do is sneeze on that feature and it's going to fall off.

Tommy Lynch:

So that's where just I'd say, accounting for physics. It's just one of those unspoken things that you got to be careful about. And I would hate to wreck a complete part because of a small antenna that is standing off the top. So that's where we would have the discussion of, Hey, if this little antenna that's hanging off the top is really that important. Then maybe let's build it as a separate piece and you build five of them because when you break it after receipt, you will need to replace it. And I don't know, did you have any additional input Greg or Colton?

Greg Paulsen:

I'll say on this and Colton, I'll let you join in as well. For this particular model, it is a model of a kind of a one-on-one growth. And I also see this type of example, when I do architectural models in 3D printing as well, where the customers or the architect will go take their design as a skyscraper with, maybe some awnings and balconies, and then they'll reduce the size to a 10 inch tall part. And first off they can run it in thin wall features, because their railings are now thinner than a human hair on their design. But then you have like, you may have other features that are kind of poking out, and it's when you, if you chip or broke that the model is gone.

Greg Paulsen:

So sometimes designing in, and in this case, this part has ultimately thickened up and these antenna were actually designed as separate features. So replaceable features, is the way to go. So creating essentially the sacrificial features for the greater good, when you're thinking about design, especially because you're probably putting most of your money into the piece that's going to survive here, and these will be that cheap relative to make. The other thing to note is pins. In McMaster-Carr I could buy a 20 pack of pins for $4. If I have a feature say I'm making a large flat panel in FDM, and I have four alignment pins in it that are like a quarter-inch diameter, those pins are now being built in that vertical direction. And they could easily snap like a pencil.

Greg Paulsen:

Now, what if I designed in holes instead, and I could run a reamer through it to give it a tight fit. And I could put in my $4 worth of pins and still have 20 leftover. And now I have actually probably a more robust feature than the designed in pins for that part and they're replaceable. So if there is an issue or if the part gets banged a damaged, I have the ability to actually repair that. So sometimes depending on the process side, you have to look at how much does it cost, or like, what is the meantime to repair for something like this, you may find that some of those smaller sacrificial features work best separated where other features, like if it's a short bars, that's at an angle is really good to combine, by 3D prints. So there's always a trade off there.

Greg Paulsen:

So actually, just a reminder I'm seeing questions come in, which is absolutely awesome. Please keep on asking questions. You have the pros here, Colton, after he hangs up the mic after this presentation, he's going to go back to break out and shipping more parts. We're really excited to answer any questions. And I know we're going over some really high level concepts, but we could get into more specifics if you need. So the last thing, I think this is the last one that I have on our design tips. But just kind of designing with evenness here and Tommy, I'll let you take that because I think you work at both the polymer and the metal side. So it's interesting perspective.

Tommy Lynch:

That's right. Yeah. So when we get into wall thicknesses, just general rule of thumb is, 3D printing is very good at accommodating and prototyping for a wide range of designs, but if you have the option and you're designing for production then for best reliability and repeatability, 3D printing does pretty well with consistent wall thicknesses. So what we're doing here, like looking at this DMLS part is, if this was built as a solid piece, and we were talking about every layer building up internal stress and molding the wall, there's a good chance that this part would actually crack during build, just because if it was built at full density, also with any 3D printing process it's a layer by layer. So we'll talk about cross sectional surface area.

Tommy Lynch:

If there's sharp changes in cross sectional surface area, per layer, across all the processes as the layers get big, and that area gets larger, it wants to shrink when it changes state. So that's going to reduce any chances for shifts in your sidewalls or just general deviations because of material shrink when you can go with the uniform wall thickness. One of the few exceptions though, is going to be with FDM where you may not have to get too creative with it because built into the process we have infills that we auto quote, and that's just basically an internal lattice structure that replaces what would otherwise be a solid part. And it's also made of the same material that you're building out of. So it doesn't have anything to be dissolved away on the inside or removed.

Greg Paulsen:

I think something to note too, when you talk about thick features versus a sparse features, is that it can affect tolerances and it can affect possibly even warp your parts. So if you imagine, I have a longer rectangle and in that rectangle is three evenly spaced holes, and let's just put an invisible line on that middle hole there. And on one side, it's completely solid. On the other side, I use a shell command and I had just one big core out, or some fancy that I lattice it.

Greg Paulsen:

What will likely happen is the distance between that center hole to the outer hole on the solid side will actually be shorter than the distance between the middle hole and the outer hole on the sparse side to CAD the distance between the outer hole or the outer hole in that middle hole on the sparse side will actually be probably closer to tolerance a CAD because most additive manufacturing platforms are scaling parts of providing offsets with the assumption that parts are not bricks, that they do have some level of sparseness to them, some level of organic curvature or even wall thicknesses to it.

Greg Paulsen:

So when you're designing with 3D printing in mind, generating more sparse walls, it does help actually improve productivity. And also you're using less material, adding material to your part equals work, equals more expense to your part. But it also is creating a more consistent outcome, just like the fillets like doing these type of tips and tricks gets you an outcome that's more predictable. The first time around and often will help save iterations to that. Another thing is I've seen examples where imagine a top hat and it has a brim around it. If that top hat was filled, the brim would curl up because all the stress of the material shrinking in that center mass would actually pull on the weaker part, which is that brim, where again, if it was looked like a top hat, it was hollowed out, you get a consistent print from it. So reducing the wall thickness really does change those outcomes for you.

Greg Paulsen:

So I see more questions coming in this is awesome, Serena I see you typing in more questions. So please, get them ready. We have a few more things, but we're going to get to Q&A in a just a minute here. Also, I just love this. If you're making Xometry letters in DMLS, this would very likely be how we would prepare them. I just thought this is a really fun graphic here. Notice that the O, actually is getting near parallel to the build level here. So we actually do support large holes on parts. So Tommy, this is our thing. So we've designed a part let's export it. What do we need to know?

Tommy Lynch:

I can breeze through this pretty quickly. And I'd say, that this is something that I... Yeah, as far as, sorry. Number one, arrays. I've seen a lot of information on the internet where it's no secret that if you connect your parts into an array, then it will basically trick the pricing algorithm into giving a lower price. The issue with connecting parts and arrays is number one, we are now locked into a specific orientation to build the part as a whole, as opposed to focusing on the individual features of each geometry. Number two, and we were talking about it yesterday, that likely orientation will be specifically around resolving that one millimeter thick pen that is connecting all your parts at the expense of everything else. But if we were to build this part, then there is also a strong likelihood that it's just going to fall apart in production.

Tommy Lynch:

And most customers will say, "Well, that's perfectly fine because of sacrificial feature anyway." Well, the issue is for our production technicians, for accounting, for shipping and everyone else downstream, they're looking for one part and it's now going to be 10 parts, and you are pretty much guaranteed that your order will have to be placed on hold so they can confirm if it's okay that it broke, or some of the parts are going to get lost because everybody's only looking for one piece. So that's why as Xometry internally and on behalf of our partner network, we just say, "Unless it's extremely well-designed, we just don't attempt to rise." Number two, multi body assemblies. You can see that the letters have kind of been smushed together, but you can see the outlines of where the floating bodies are overlapping.

Tommy Lynch:

We can't build a part like this because it's going to end up double printing those multiple bodies. And you're going to end up with build crashes, or just general anomalies that are really not desirable, or we'll end up with the situation where we see in the third graphic below where there's a Boolean error. And if we're taking your CAD model and doing a global auto fix on it, then that's somebody altering your model so that it can be manufactured, but they're not intimately aware of the intended, like function of the design and things can get misinterpreted in that operation. And then you end up with a non-conforming part because we were trying to help clean up the CAD.

Greg Paulsen:

Yeah. And we do run some basic stitches. So that usually is for inverting flip triangles and things on STLs. But yeah, this is a good case where we caught it after print here, obviously, which I guess led me to a good photograph of where these fins were actually a separate body from the outer ring here. And they upload it just like how you see this, O, kind of interfering here. And what a STL file is a series of surfaces. That's either this is pointing towards the outside or this the inside of the part. And when you have these overlaps and it thinks it's pretty one part, sometimes the software actually gets confused. It's like, I think this is all outside. And that's exactly what happened here. Was it just negated those features. And you have a void again, good photograph, but we made the part again.

Greg Paulsen:

The other thing I noticed, I see so many questions, so I'm going to go through here, but we can convert the file to the right resolution. So some says, a bunch of different file formats when you upload including native format. So if you're uploading like IPT or solid part, you could do that directly. If you do convert to an STL, we can't do too much with that. If it's a lower resolution, right. So I actually do recommend using a step or editable CAD. It's also usually a smaller file size than STL because it's not jam packed with triangles have point.

Greg Paulsen:

It has a pair of solid features. So we're going to get to the question and answer. So please, if you have any more questions throw them on there. I do want to point out that we have some really great resources online Xometry.com/resources, design guides for every process that we offer. We have the complete guide to 3D printing, which some of the topics we talked about today are also covered there as well as like a complete novel batch processes. If you want to get more academic on it, case studies by industry all this really interesting information. Serena, do you want to go over to the referral program?

Serena Ngoh:

Yeah, sure. We have two promotions to share with you for you all who have stayed until the end. If you want to share Xometry with a colleague, then you will get $50, once they register and order for the first time with us. And if you don't have a colleague to refer, and want to go ahead and order, then you will get $50 off your next order of $100 using the code INSTANT50. We'll send this out in the email tomorrow. So you don't have to write this down or remember it. This is valid until the end of February. So now, Q&A. So just as a heads up, it looks like we're nearing too quickly. So we're going to prioritize your questions and spend the next five to 10 minutes answering them. But if you have another question you want to ask, these engineers contact information is here. So please feel free to reach out and if not, they will reach out to you. So to get started, first question is, are you able to build layers using multiple different materials, especially for powder metal?

Tommy Lynch:

I can take that. When it comes to multiple materials with metals, I'd say it's not impossible, but it is highly impractical because you have to worry about the compatibility of will the two materials actually weld to each other? The other thing is it is very limited because within any build platform, you can only have one powder type. So it would basically consist of building your part on one machine and then eyeballing it in the second machine and getting everything leveled correctly, and then building in a second material. And I'd say, it is very rare that anyone wants to attempt that on their equipment.

Greg Paulsen:

It's definitely more research than academic the way we're running at Xometry, we are running more on as a... Our goal is to make parts, to quality on time. I will say if you're interested in further reading, check out a company called Aerosint, Aerosint does selectively deposited powders. And it's very cool. Like I have been eying them for like six years now ever since they opened up. But that is coming on the horizon where it's depositing different materials. I think, my practical running machine head will say, "What about cross-contamination of everything else that's not centered?" But it's still really cool. And also our speed 3D. It does a kind of a cold weld deposition, very course product that's coming out, but you could do some really interesting things with cold welding, as well as like Fabrisonic with ultrasonic fusion. These aren't on our network, but there are examples of metal 3D printing with multiple materials.

Serena Ngoh:

Awesome. So this is a good question for Colton. What does your process of optimizing a part for manufacturing look like?

Colton Bamford:

Yeah, this is a great one. So I actually broke a couple of my rules making that earlier test part. So the things that I'm thinking about are a lot of the things that we talked about in this layer by layer at this point, I kind of see every 3D object that I look at just layer by layer, by layer. So bottom up design, whether it's for tiny desktop FDM machines, in my spare time or even the stuff that I'm designing to print here, where is each layer going to go on top of the previous one and how much strength am I going to lose for each orientation, each process. So, I'm privileged. I get to design for FDM, PolyJet, SLS, everything like that, but thinking about the way it's going to be manufactured, really guides all of my optimizations.

Colton Bamford:

So fillet everything. I love the fillet key. I have a hot key for it. Fillets chamfers make nice strong parts, follow any of the guidance that we gave in this, and you'll have a printable part. And then mastering them is exactly what rapid prototyping is for. I can't say for every part that a fillet will work somewhere, but I know by the third revision of something, we know exactly where a fillet needs to be, so it's good practice to get a good workable prototype and then refining from there is a really the best way that I've found to make parts.

Serena Ngoh:

Great. And speaking of fillets, what's a good minimum size for filleted features?

Greg Paulsen:

Yeah. So you could be as generous as you want with fillets. That's the cool thing about additive, because it's not like a tool path, but if you keep it, gosh, we get them going back between metric and inch so much. Now I'm going to go fractions of an inch, 1/32nd. And I'm only saying that because, on small edges, I've found that adding that little bit of fillet creates probably beside the minimum of consistency between every single process. So I just had a privilege of making parts in 14 different materials, over six different polymer processes. And where I saw the most consistency was usually unfiltered edges. And I found that, just anything I had about that little bit of fillet, or more just escape consistent part even between processes.

Serena Ngoh:

Okay. And let's get some more numbers in here. What's the thickness range of each layer on a 3D metal printer?

Tommy Lynch:

For metal printing. There's going to be a range of layer thicknesses dependent on material, and also a machine type I'd say in general, you'll see some of the smaller high res machines, that have become commercially available. They'll be starting out in the 15 to 20 micron range, standard layer thickness for most materials on the midsize platforms like your EOS M280's, M290's, Concept Laser, Mlabs is probably going to be in the 30 to 45 micron range. And then once you start getting into the larger systems with like the 1,000 watt lasers and stuff, they can melt metal pretty fast. You'll be looking at typically a 50 to 60 micron layer thickness.

Greg Paulsen:

Yeah. And something to note is when you're on those smaller, like 20 to 40 micron range, what's unique about DMLS is that a lot of times my layer height is the same as my average material height. And so the transition of smooth curvatures and the stepping that you may see on other processes including SLS, which is pretty fine, but you'll still see stepping it's less on DMLS. So this part right here is made out of aluminum and it is actually, it's about like, a five or six inch tall part. And that was probably made, I think, in demos a little around 45 micron, just to kind of give an example. So you still have some decent detail, you have that kind of welded matte finish to it. But the detail is still pretty good because layer heights is same size as the particle size.

Tommy Lynch:

And before we move on one thing that I wanted to add to Colton's question about optimizing for 3D printing, for us three, when you've lived and breathed 3D printing as your job for the past several years, I mean, it becomes kind of intuitive just to anticipate orientations and stuff, but for someone that is just learning how to 3D print, I'd say the best way for you to start moving towards optimization is go ahead and sketch out your idea, upload your part to the site. And if there's any critical features, like if we're going back to the snap feature part that we were looking at, don't worry about saying too much because we look at this stuff day in and day out.

Tommy Lynch:

And there's a chance we probably already know how you're going to be using your part, but all you have to do is say, "Hey, these pins are going to be most critical or Hey, I really need these snap features to work." And regardless of the material or technology that you've chosen, that triggers us to say, you know what, actually, "Here's what I would recommend. Here's some slight changes you might want to make," and it should be within the realm of the advertised process tolerances, and then go from there. And then obviously, take your prototype, test it out, try to break it. And if it works out great, now you're ready for production. If not, then that's what 3D printings for another low cost prototype.

Serena Ngoh:

And Tommy, when you say, "Tell us what the most critical features are, you're saying in the quoting engine, in the note section?"

Tommy Lynch:

That's right. Once you upload the part to the quote, I mean, we've got a fleet of account managers that their job is to make sure that you're happy. And there are times where they will be able to help get you pointed in the right direction, but they're also trained to escalate any really detailed questions, to our team to make sure that you're getting the right answer. But yeah, when it's loaded to the quote, just fill out some notes, it doesn't have to be paragraphs, just point us in the right direction of what you need.

Greg Paulsen:

Yeah. I'm also a user of Xometry myself. And just for example, this isn't the critical features, but looking at the CAD. It may not be intuitive that this is actually a hundred separate pieces that are interlinked together. So I just put a simple note saying this is a chain mail mesh, please are all powders broken free of the part. And it probably already was done by just by saying that it gives kind of an extra sanity check for our operators.

Serena Ngoh:

Awesome. So let's go back to plastic 3D printing, when it comes to fused deposition modeling (FDM), what should the wall thickness of thin walls be? Is it good to go by a multiple of the nozzle size?

Colton Bamford:

Yeah. So I can actually take this one probably, so that is a prevalent design tip. That's aimed more at desktop printers. So your Prusa's, Ultimakers, MakerBots. A lot of that is getting the most strength out of the walls by doing multiples of the nozzle size for ease of slicing, for making sure that they're consistent across the surface with most of our plastic manufacturing, our machines basically are good enough to calculate that on their own. So it's not necessarily a multiple of the machine that it's going into, just because of all of the slicing processing and everything that goes into our production-grade machines. So it's not as applicable to ours. I will say for very, very small parts on thin wall parts. We use smaller nozzle sizes, but for the vast majority in all of our FDM printing, it's two nozzles and they're already multiples of each other and they do the logic within the slicer and within the printer itself.

Colton Bamford:

So it's not really necessary to try to figure out what kind of nozzles we're going to be using just following our guidelines of an FDM one and a half millimeters on supported walls, good to go supported walls as low as a millimeter and nothing is going to resolve under 0.7, 0.5. And you really don't need to do any more complicated maths or ratios than that, feel free to chime in if you have anything else, guys, but yeah-

Greg Paulsen:

I just want to point out under xometry.com. If you go to our capabilities, we have some great pages per specific process, including these pages, we'll link you to where to get your design guides for processes. But I'm going to go down here in the Fused Deposition Modeling. I could go down to tolerances and learn a little bit more about general tolerances of that specific process, what to expect from layer height, and some like more specific main features for process there's always exceptions to the rules, but if you're already designed with this in mind, you're designing with an expectation of what you're going to get, which is our goal here is like we ship parts, so we're always looking at general expectations. And then as exceptions, we're always happy to work with you and make sure that we could get those features resolved.

Serena Ngoh:

Awesome. So I'm going to ask two more questions. We're getting to the end of our live questions, but again, feel free to reach out to our engineers if you have follow-ups and thanks for hanging on to listen to this live Q&A, all right. So this is kind of a general question related to the design guides you just showed Greg. If you don't know, what 3D printing process is best for you, then how do you know, how do you make that decision? And if you kind of choose a 3D printing process at random, then what can your parts be used for?

Greg Paulsen:

The good news is there are definitely some processes that are just generally great to use. So when you, Selective Laser Sintering and Multi Jet Fusion are both Powder Bed Fusion processes that tend to make a cheap part in a very durable material without the need of support structures. I call it like the 85, 90% tool because 85, 90% of the time in your product development cycle, they'll work for you. They'll work pretty well. And FDM is also there as, it has a little more boutique nature to it, but usually design roles are closer to like, if I'm designing for CNC where it's bulkier, it can build bigger parts out of that, and it has more material selections available.

Greg Paulsen:

We have a team here though, and I can't stress this enough that if you make your design and you have that intent behind your design. If you upload to our site, talk to our account reps, a lot of times we can help give you some very quick suggestions and tell you why not just making the SLS, but making the SLS, because it looks like you want a little bit of flex here and nylon on that thickness will give you a nice amount of ductility. And so we can help elaborate a little bit.

Greg Paulsen:

But there's a reason why we offer all these 3D printing processes at Xometry it's because each one has applications where it's really, really, really good at achieving those. And some of them have weak spots too. So by having a wide variety of these processes and the traditional process, like molding, machining, casting sheet metal, we look at every single project with more of an agnostic view of like, where will this... What process will work best for this type of part at this stage in product development.

Colton Bamford:

Greg, I'll also say that one great tool that we have for that is that decision tree that you showed earlier. Do I want this clear, do I want this rubber like, if you're coming in with an FDM part and you're like, this would be really great in stainless steel, well, okay, there it is right there. That's the kind of thing that we're going to flag and be like, "Oh, I think what you meant was DMLS now here's the material options we have and everything." So using that tree to get into the ballpark, and then any unsure details that you don't have throw them into the notes and talk to an account rep, anything like that jumping off point of that decision tree will get you much closer and get some really profitable or not profitable, but useful conversations with anyone that you've talked to-

Greg Paulsen:

Hopefully profitable too.

Tommy Lynch:

And I'll add one more spin, on that decision tree is also with the auto quoting function. I mean, even for me, I look at a part, I have a preconceived notion of what's going to be the best option for printing. But many times price is going to sway my decision. And so you drop the part onto the website. It will automatically tell you if it fits within the bill platform of a selected process, and if it fits, then it's going to show you a price. And then sometimes you might find out that the part would be $1,000 in that process when you had a budget of 100. So that kind of helps make the decision as well. But when it comes down to it, definitely we have a lot of resources over here, a lot of account reps to help kind of hold hands and kind of guide you through the process. Many times there's a lot of ways, that you can print parts, but it's a matter of will it meet your budget and will it meet your quality requirements?

Greg Paulsen:

Yeah, I think, Serena, I just realized we're 15 minutes over and I see most of you have stayed on, which is absolutely awesome, but I think if there are any other questions, again, you have our information. And also if there's anything we did not address during this, we'll get back to you as soon as possible. But yeah, I think we'll call it in and say, "Thank you." Any last words, Colton, Tommy, Serena?

Serena Ngoh:

Thank you all for joining. Thank you to our expert panelists.

Greg Paulsen:

Thank you. It's so much fun, like prepping for these working with experts, at Xometry, this is always great and really, really do appreciate you joining on and taking your time to learn more about design for 3D printing. Thanks so much, guys.


Serena Ngoh - Xometry Contributor
Serena Ngoh
I write about Xometry and all things manufacturing. You might also see me hosting webinars, designing infographics, producing videos, and working directly with customers to tell their manufacturing success stories.